Deployment
Run yeaboi as a cloud service via OpenClaw on AWS Lightsail. OpenClaw comes pre-installed on the Lightsail blueprint and uses Amazon Bedrock (Claude Sonnet 4.6) as its model provider.
1. Create the instance
- Open the AWS Lightsail console
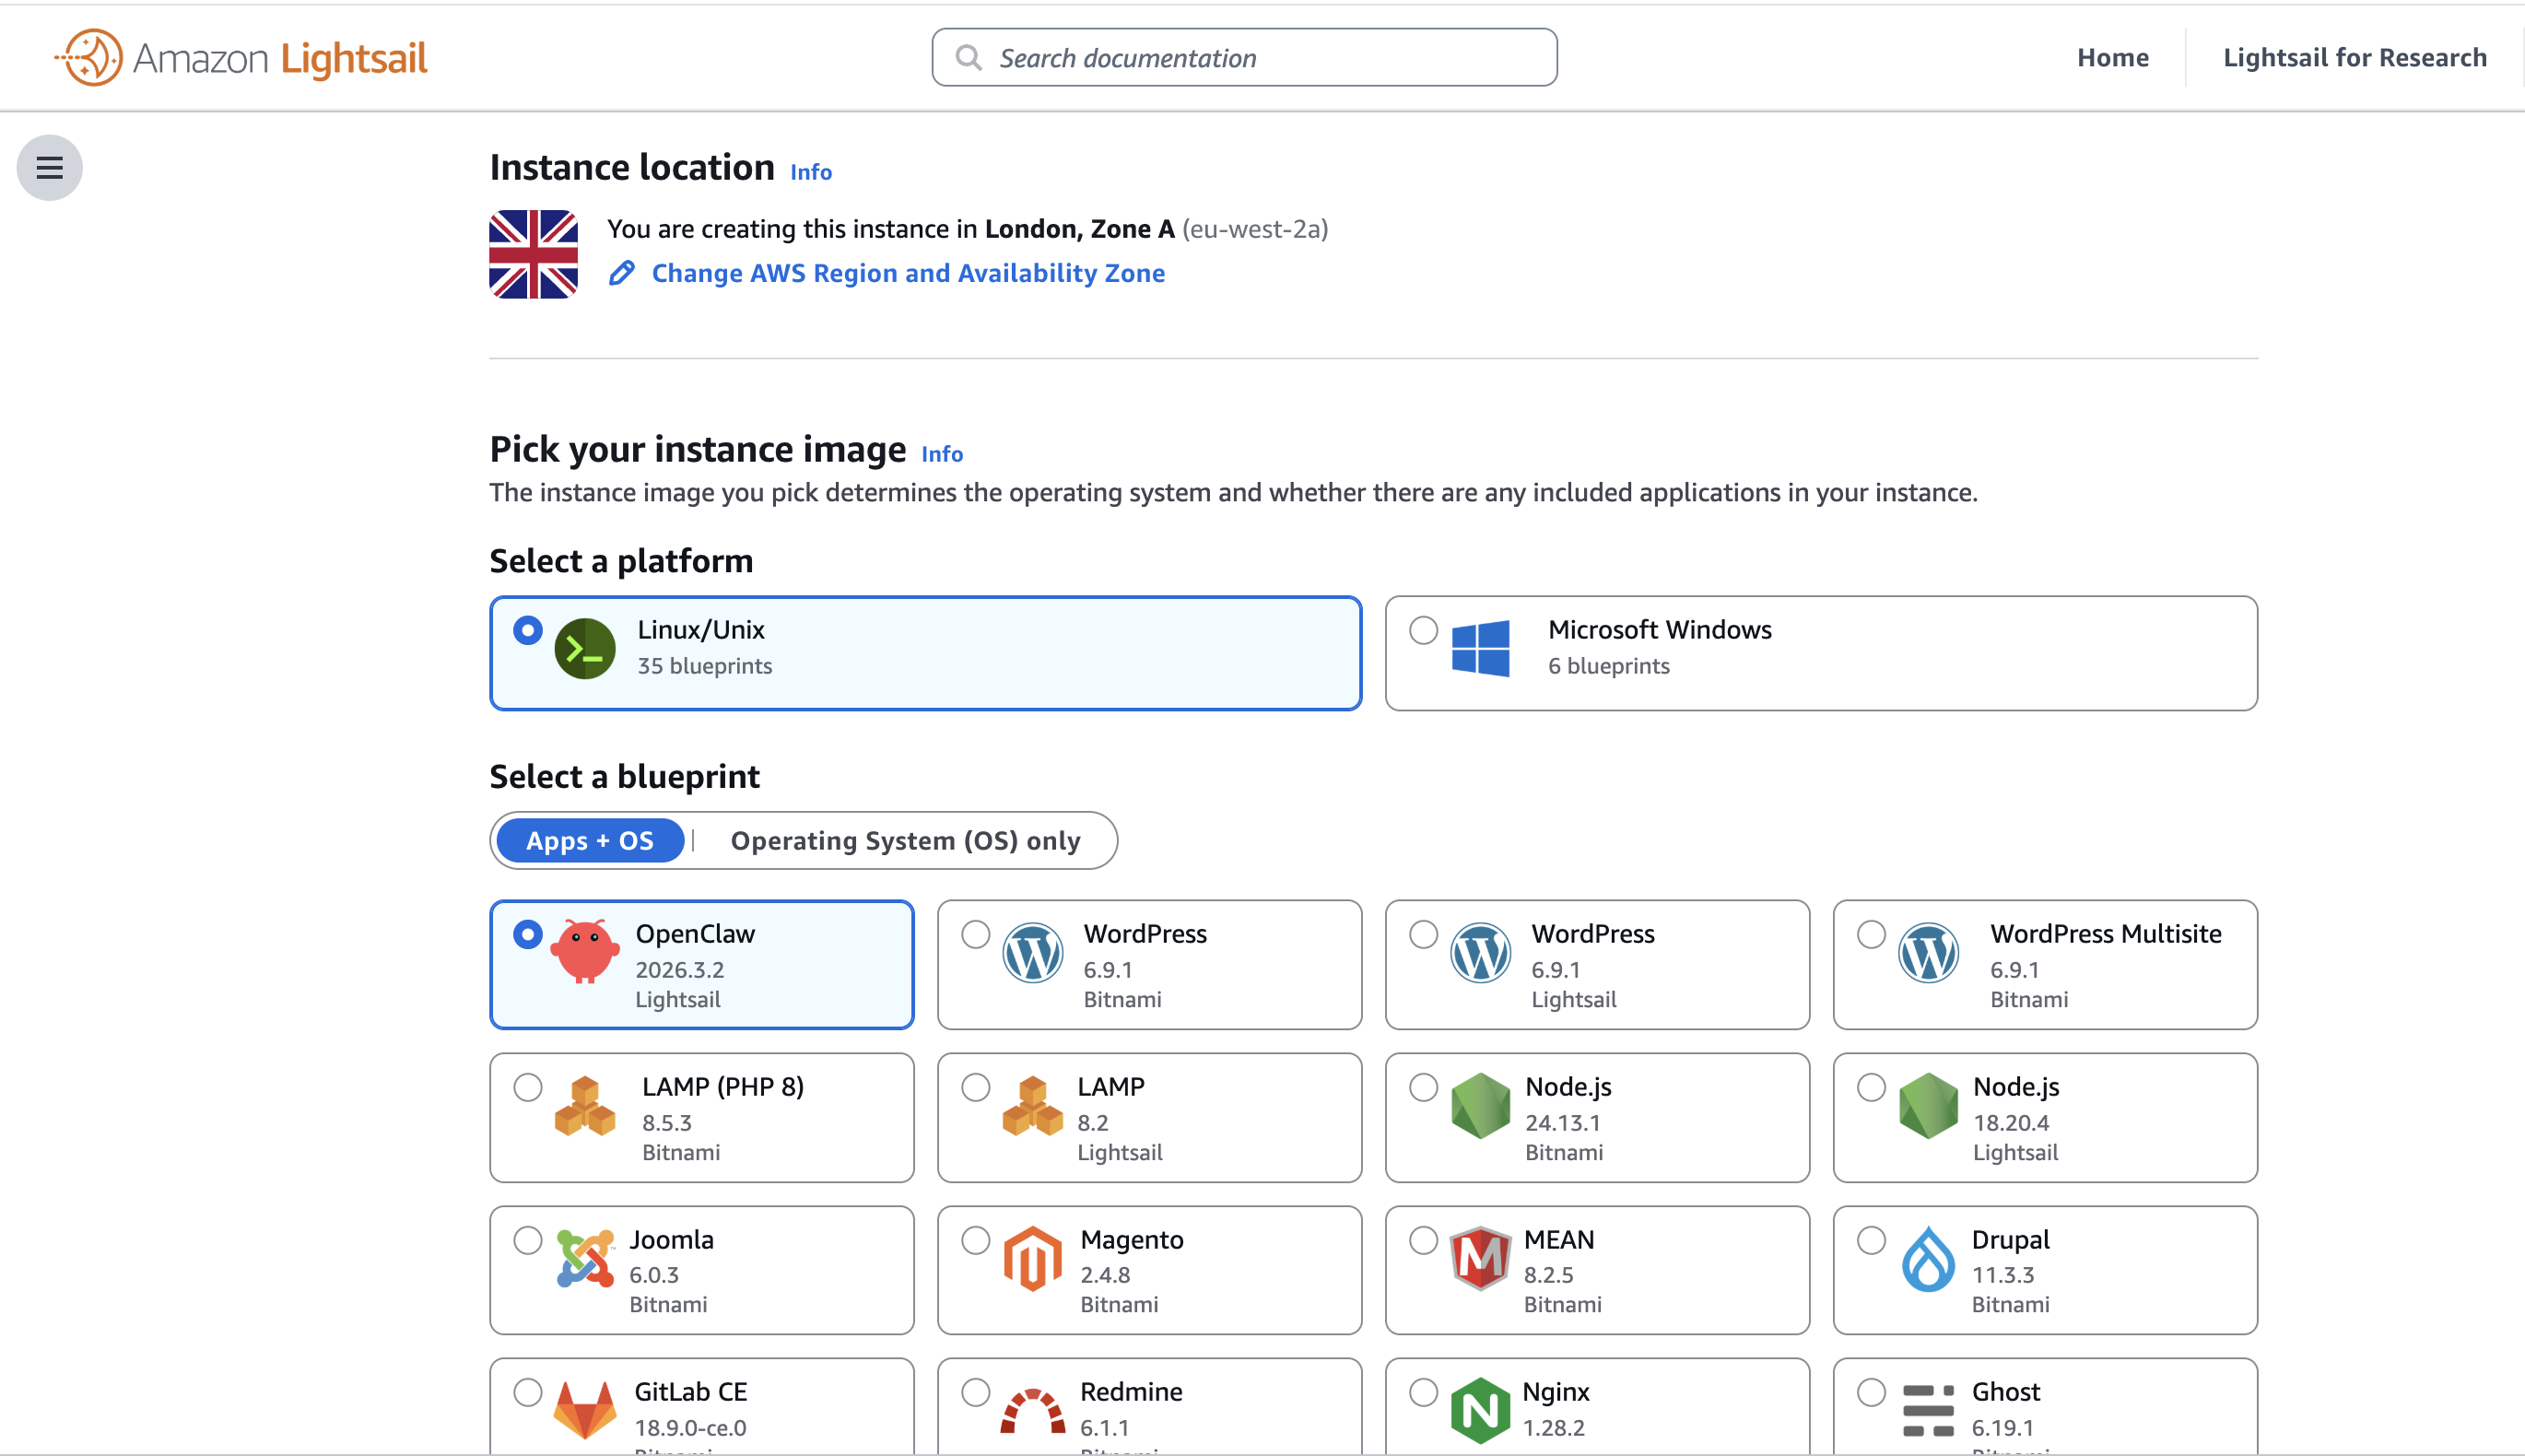
- Create instance → choose the OpenClaw blueprint under "Apps + OS"
- Select your region (e.g.,
eu-west-2) and instance plan (2 GB RAM minimum recommended) - Name the instance (e.g.,
OpenClaw-1) and create it
2. Attach a static IP
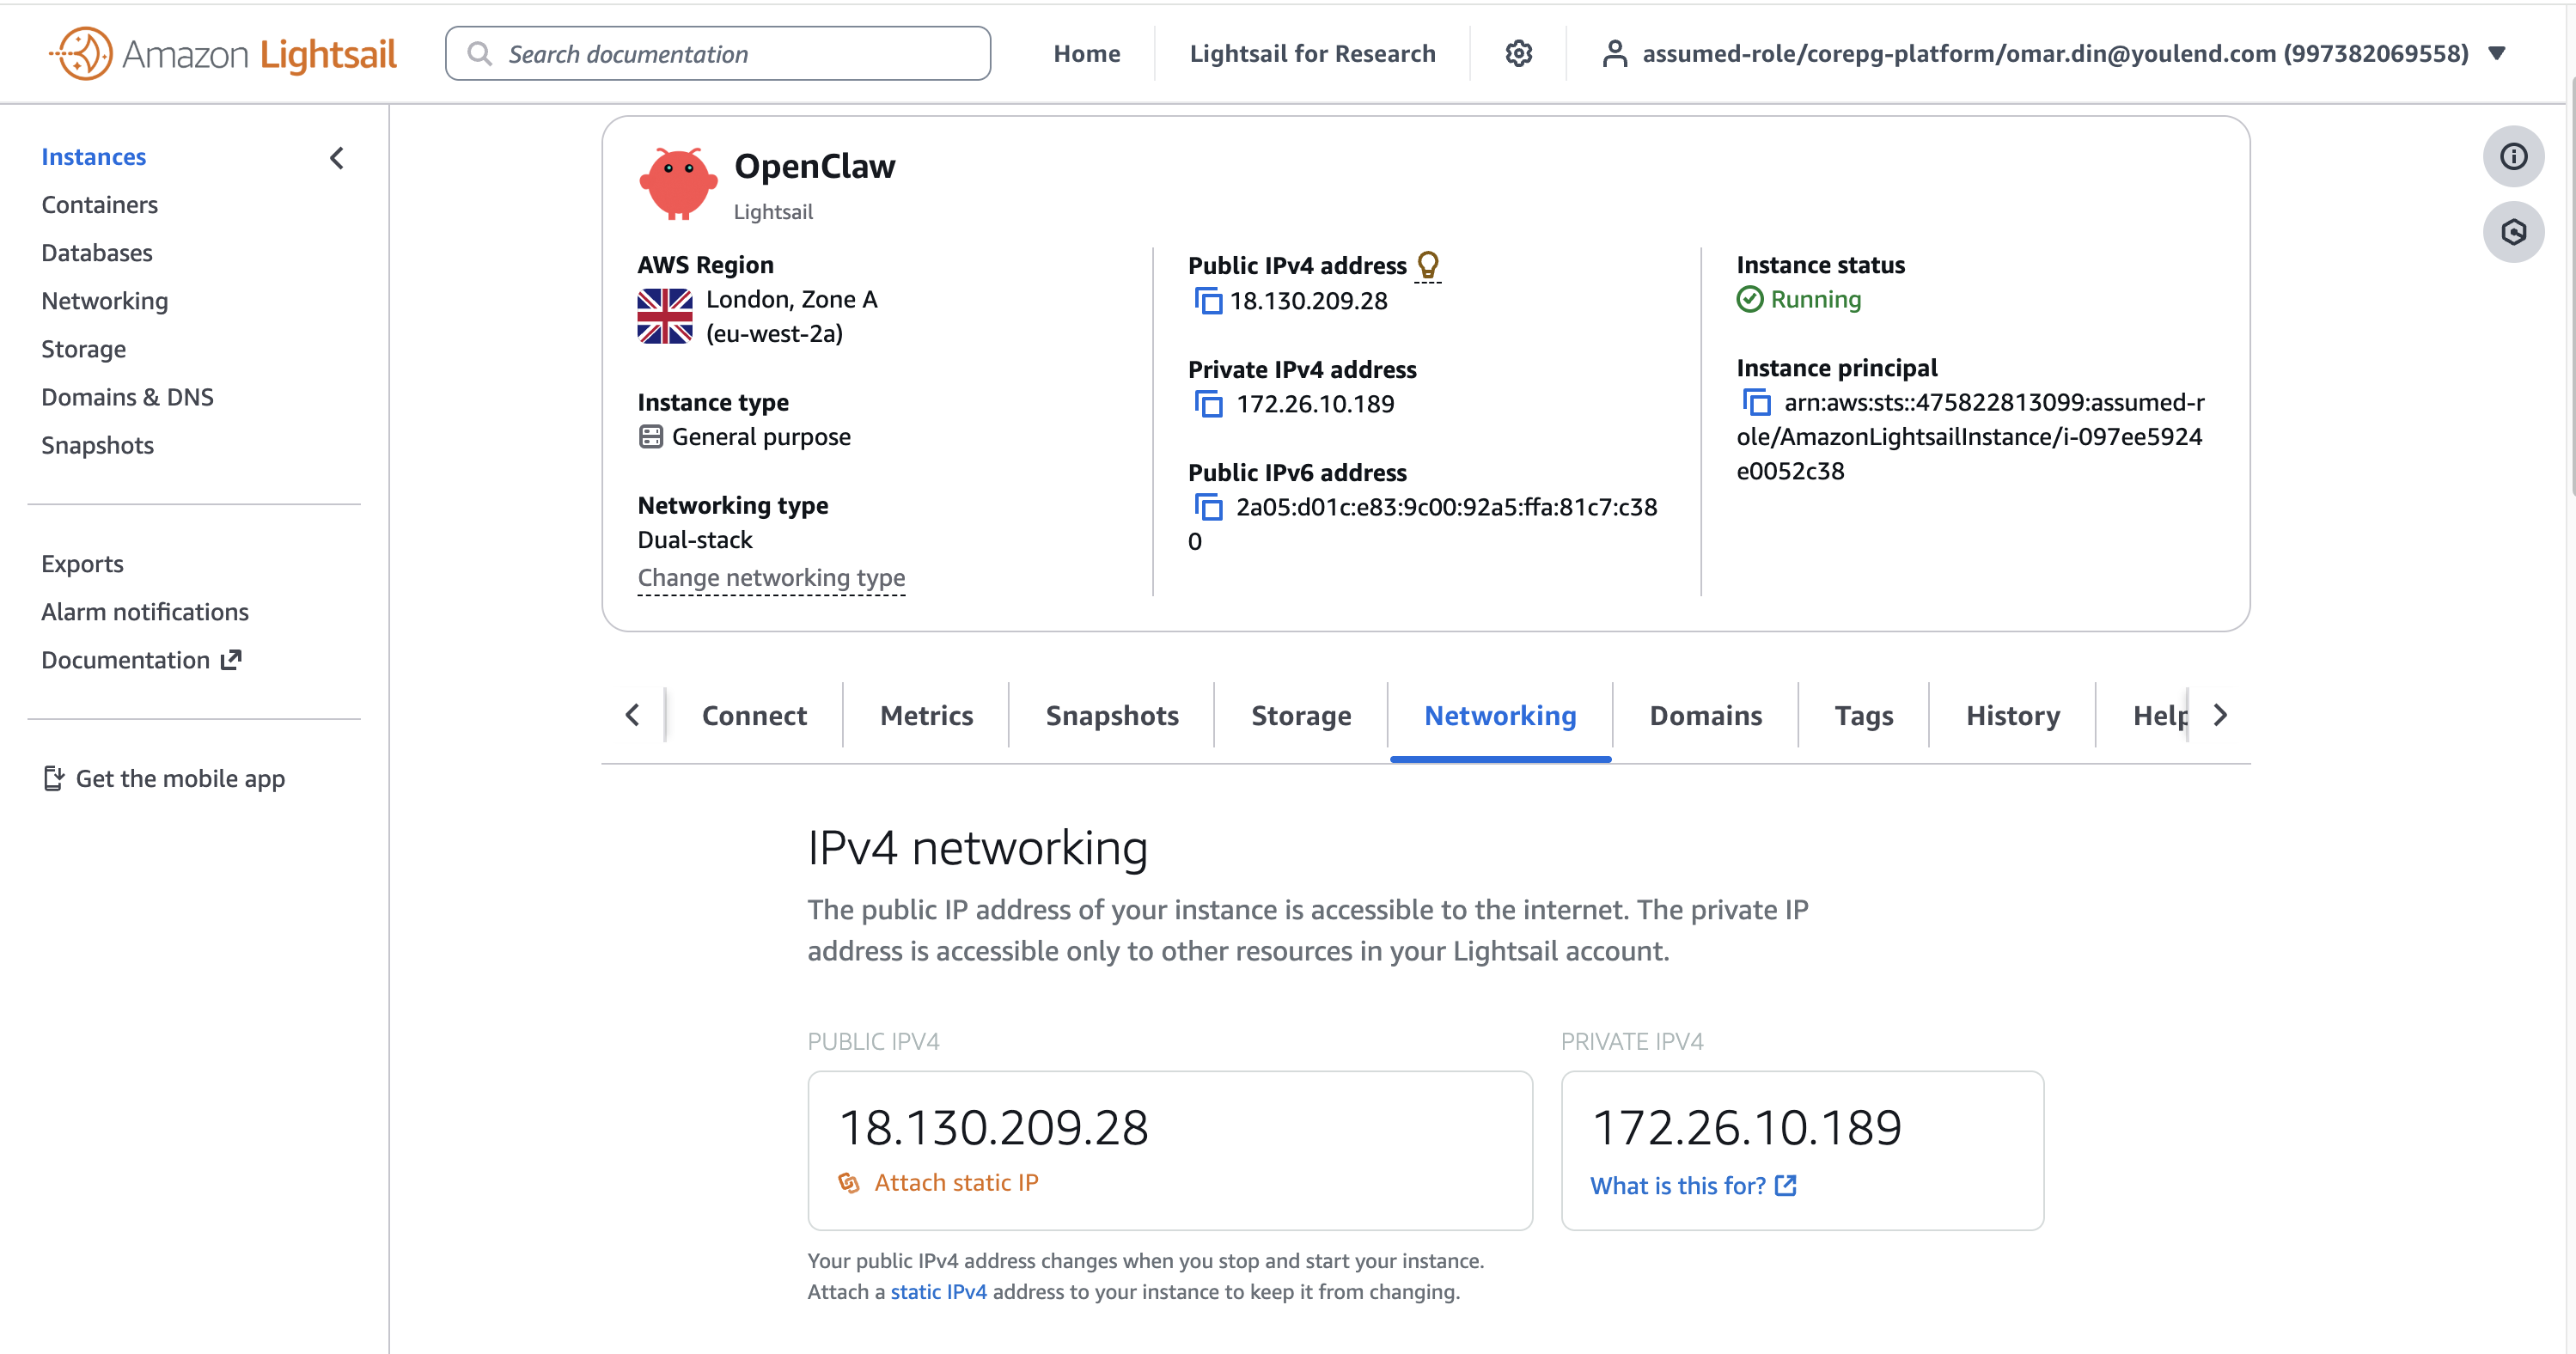
Your public IP changes on every stop/start. Attach a static IP in the Lightsail Networking tab to keep it stable.
3. Enable Bedrock access
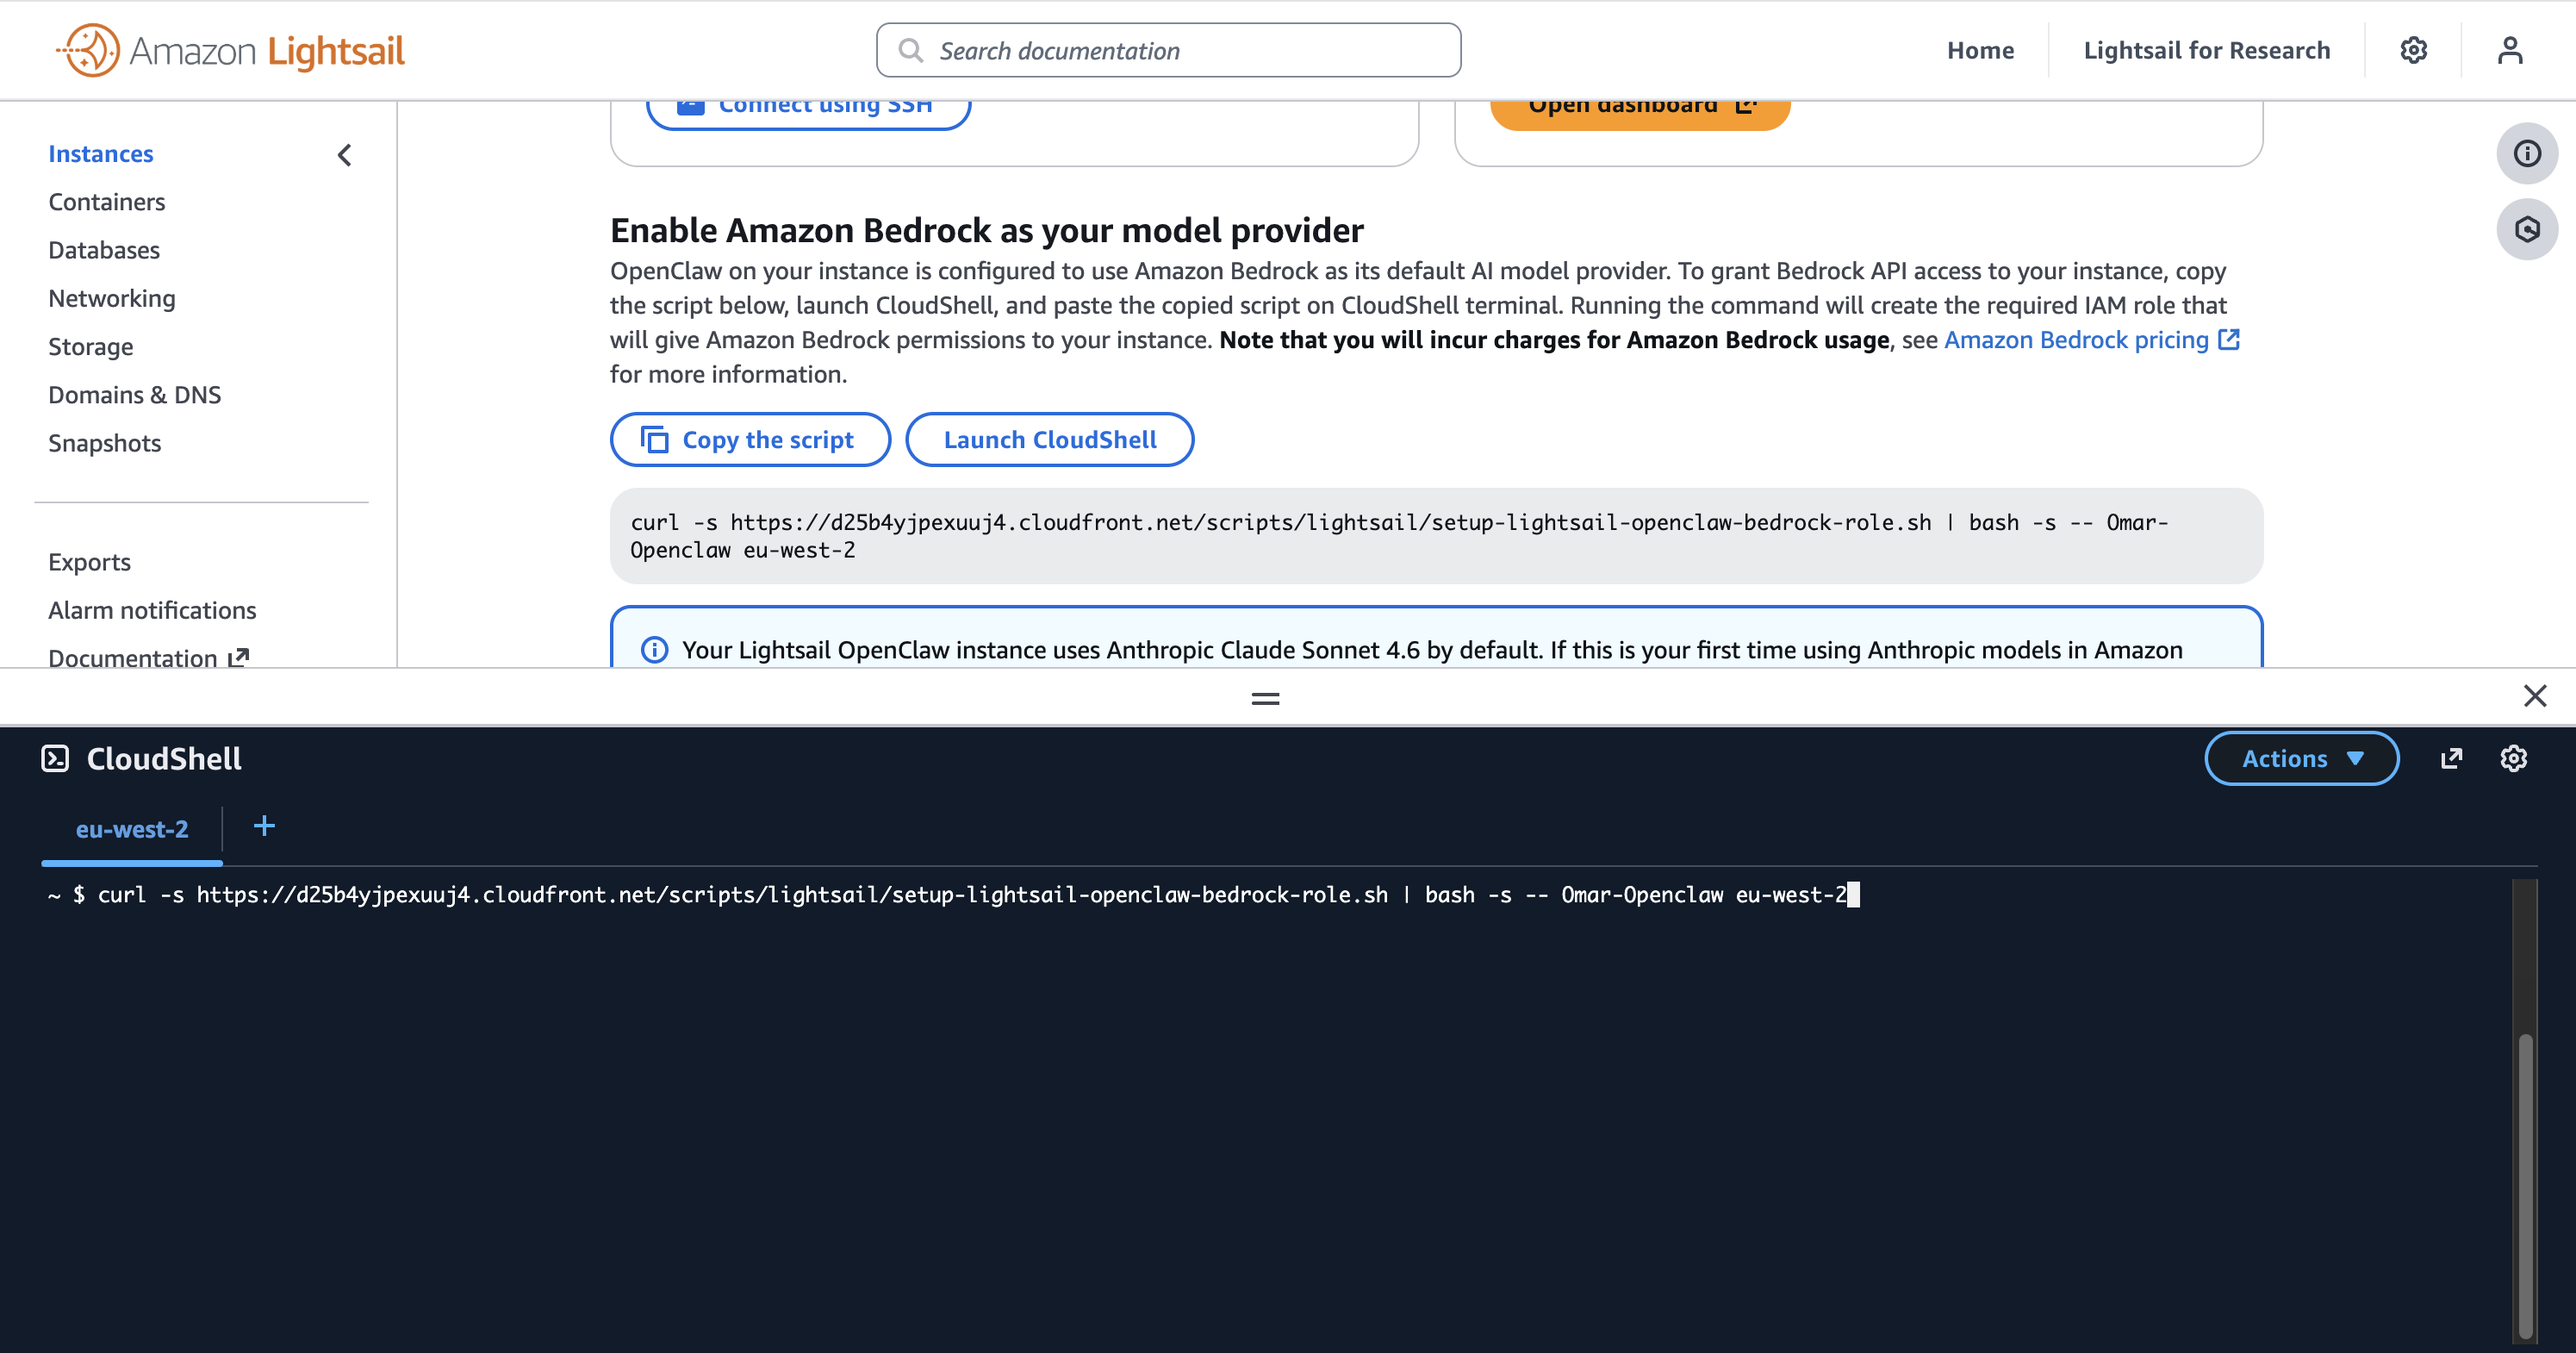
OpenClaw uses Amazon Bedrock as its default AI model provider. Grant Bedrock API access by running the setup script in AWS CloudShell:
curl -s https://d25b4yjpexuuj4.cloudfront.net/scripts/lightsail/setup-lightsail-openclaw-bedrock-role.sh \
  | bash -s -- OpenClaw-1 eu-west-2
Replace OpenClaw-1 with your instance name and eu-west-2 with your region.
Note: If this is your first time using Anthropic models in Amazon Bedrock, you'll need to complete the First Time Use (FTU) form to gain access.
4. Pair your browser
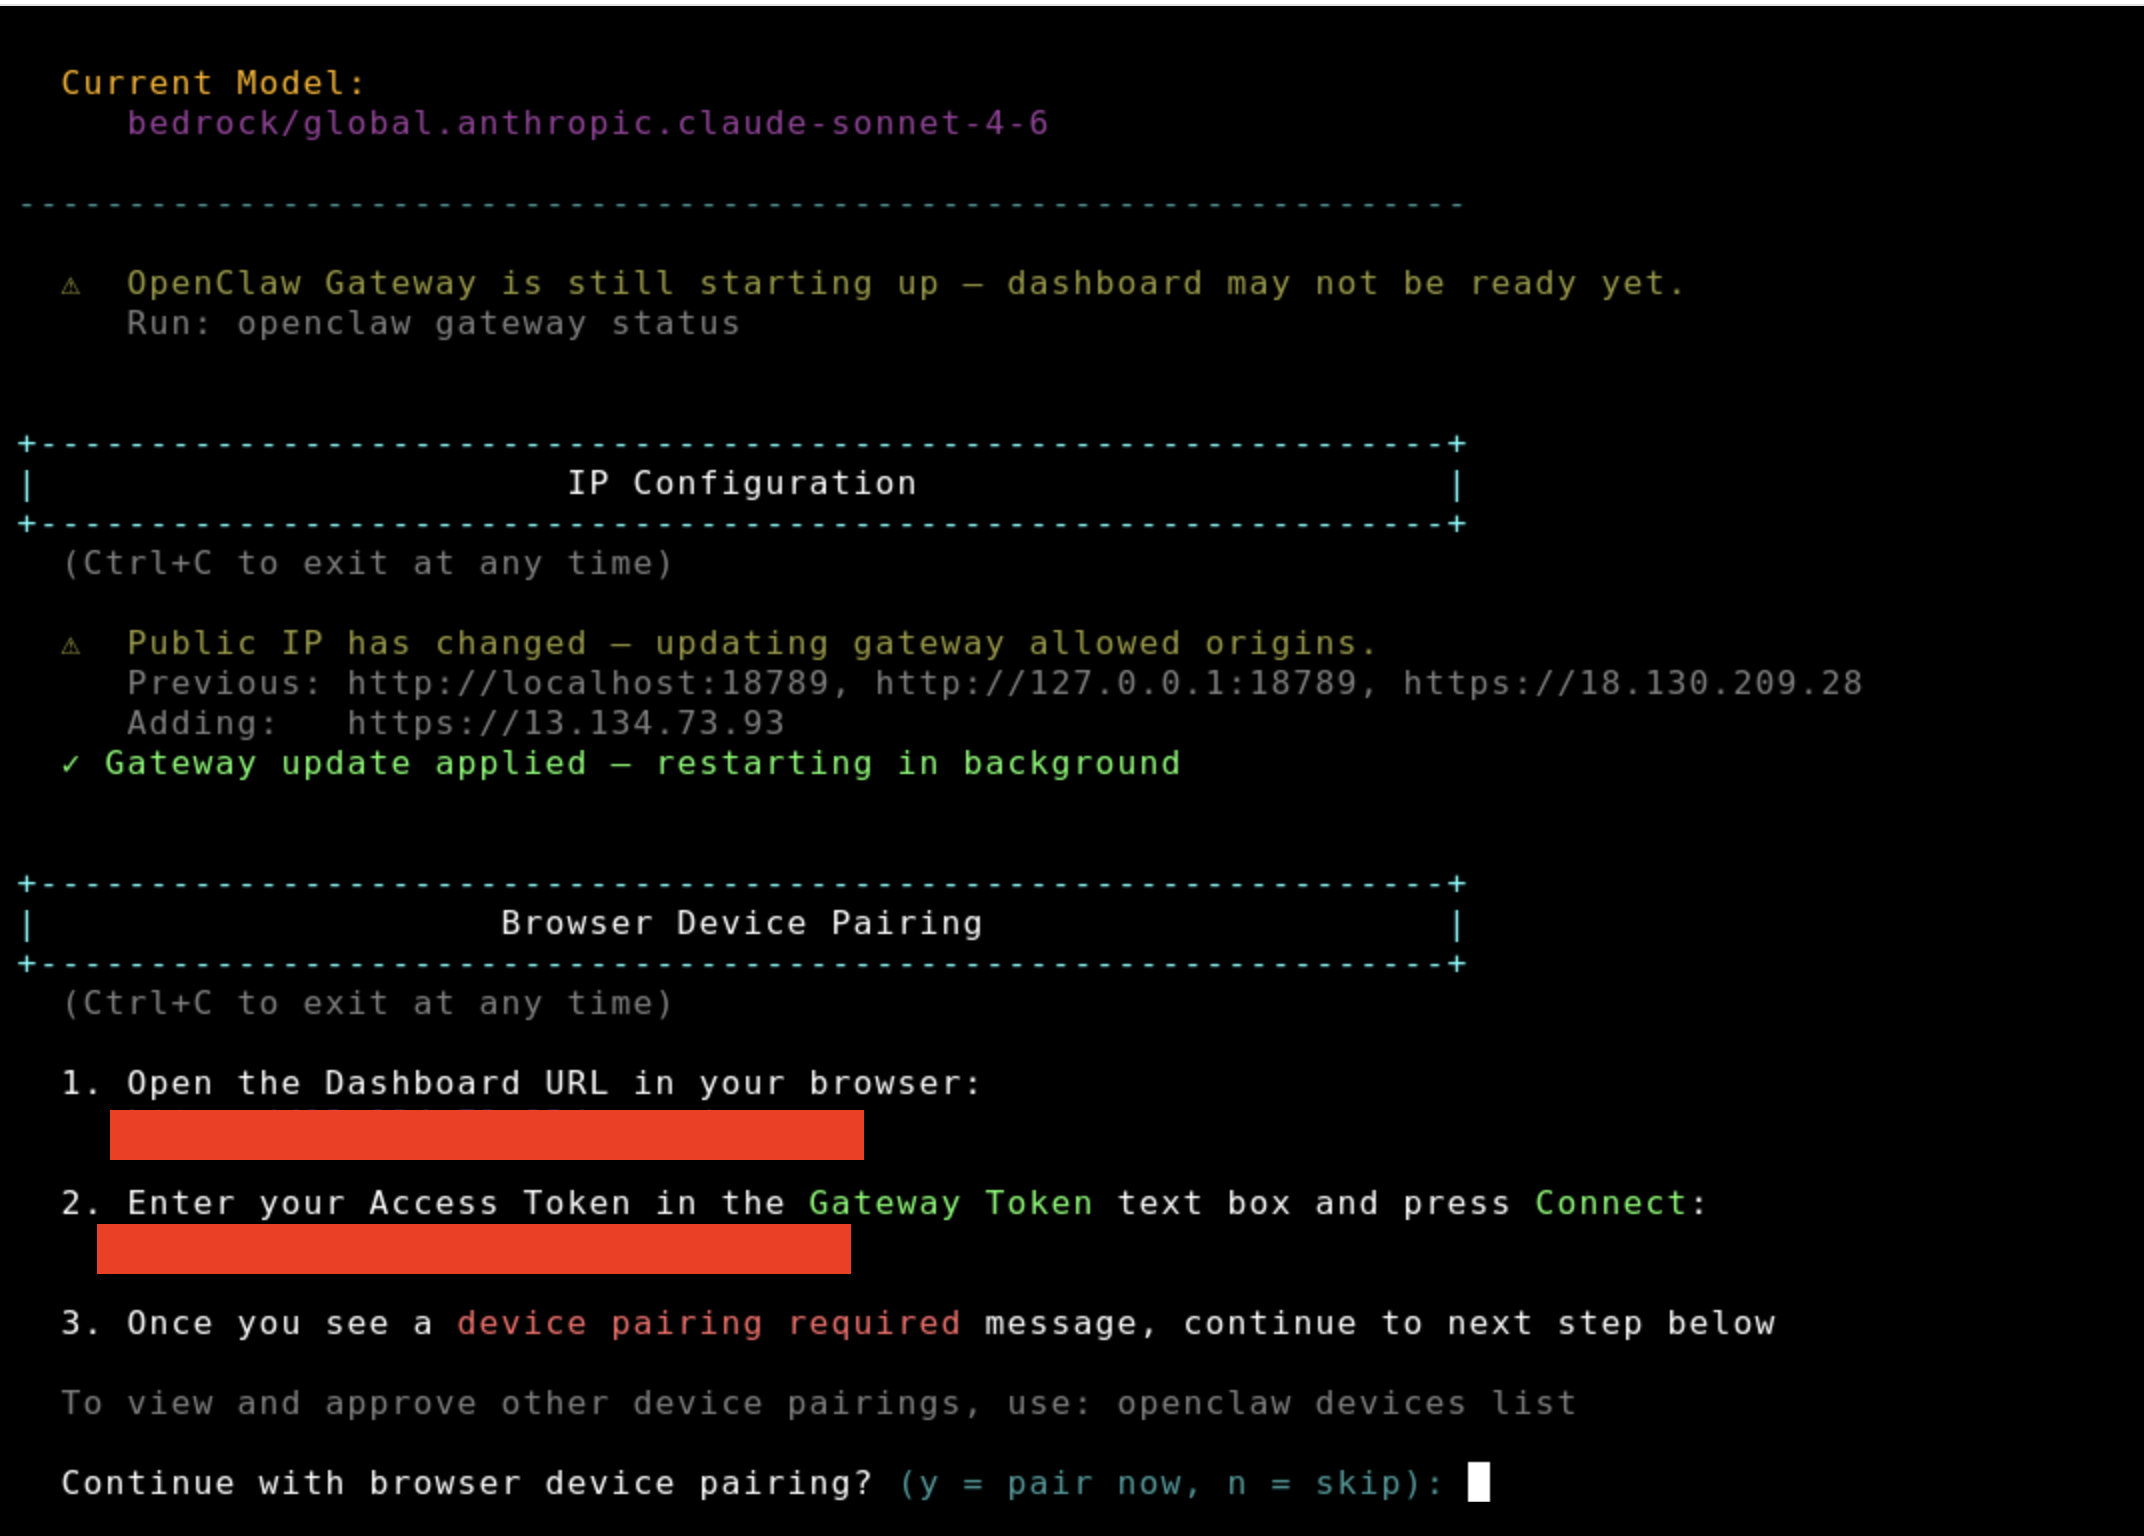
- Click Connect using SSH in the Lightsail console (or use your own SSH client)
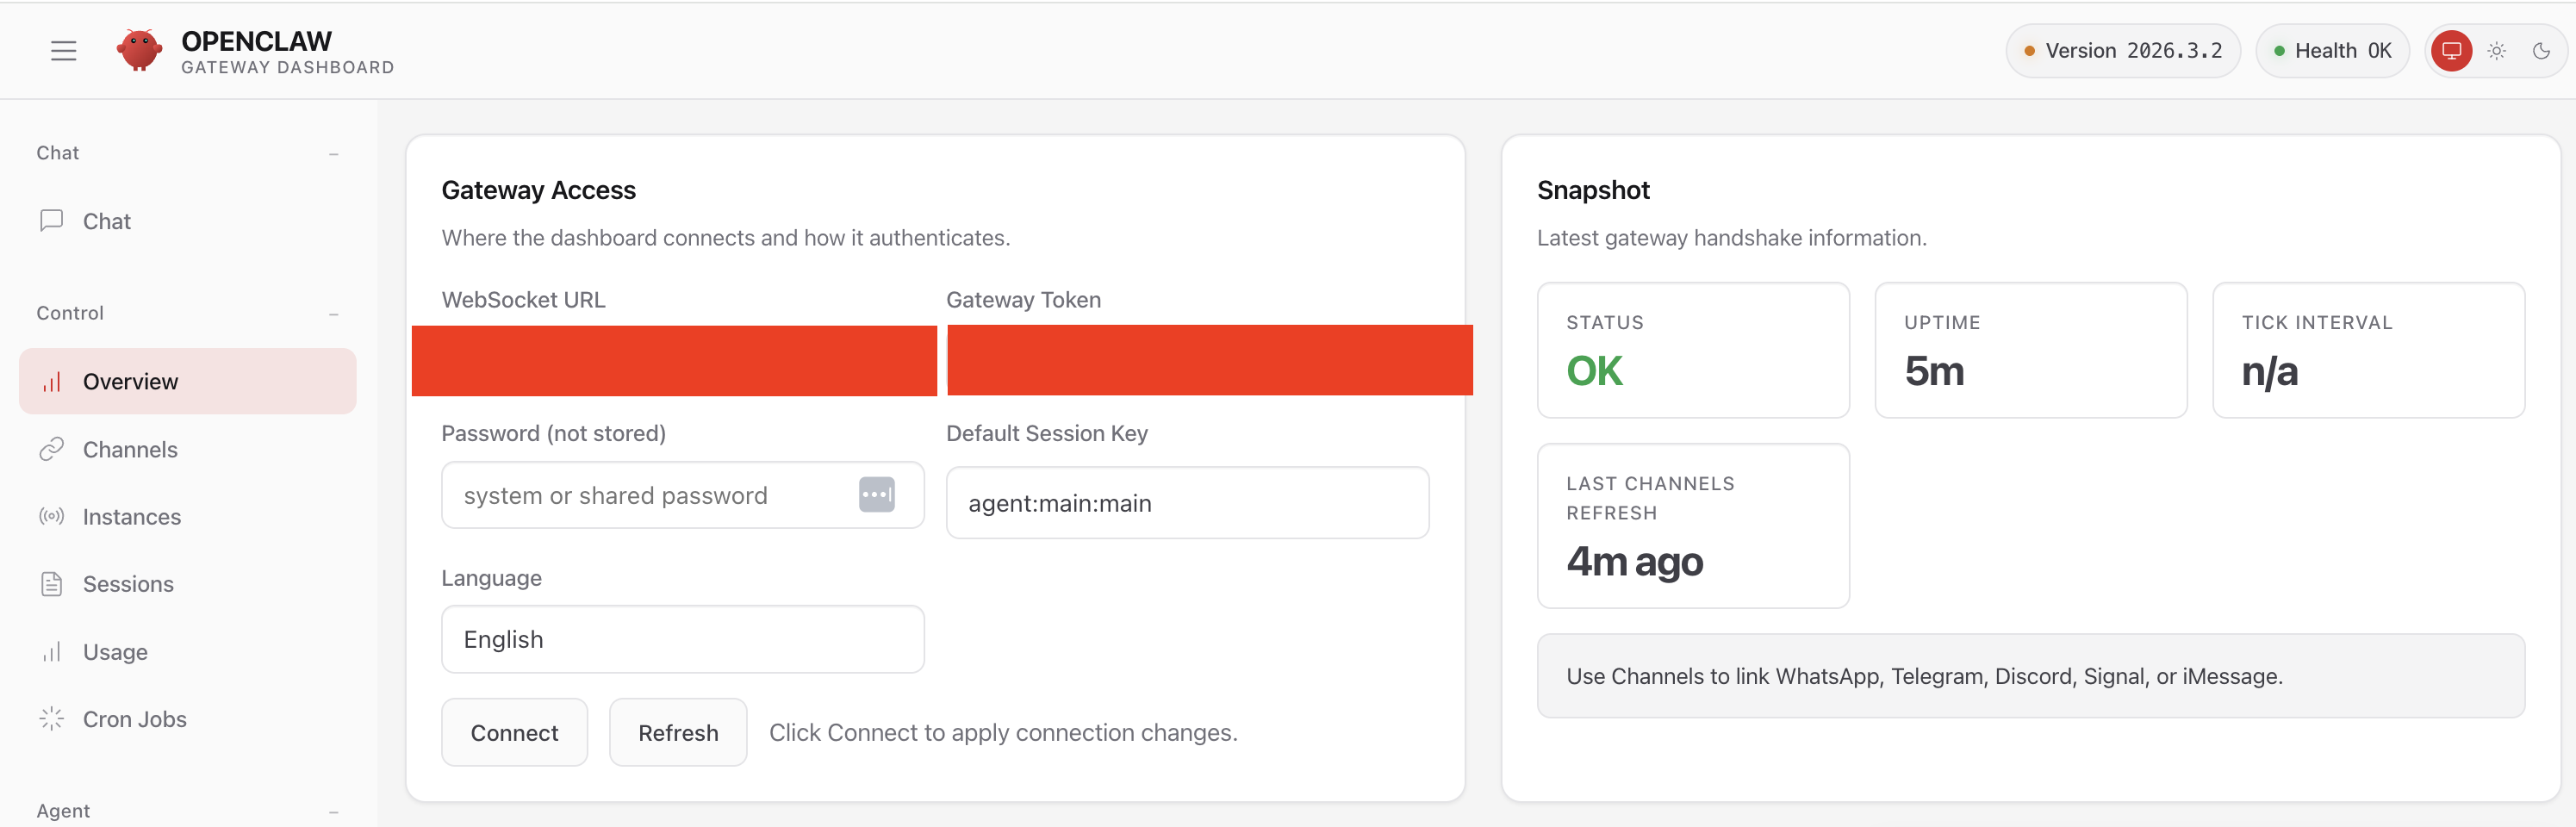
- Follow the on-screen instructions to pair your browser with the OpenClaw dashboard
- Click Open dashboard to access the OpenClaw web UI
5. Install yeaboi on the instance
SSH into the instance and install yeaboi with Bedrock support:
# Install pipx if not present
sudo apt update && sudo apt install -y pipx
pipx ensurepath
source ~/.bashrc   # reload PATH so pipx-installed binaries are found

# Install yeaboi with Bedrock provider
pipx install "yeaboi[bedrock]"
Tip: If
yeaboi: command not foundafter install, runsource ~/.bashrc(or start a new SSH session) to pick up the updated PATH.
6. Run the setup wizard
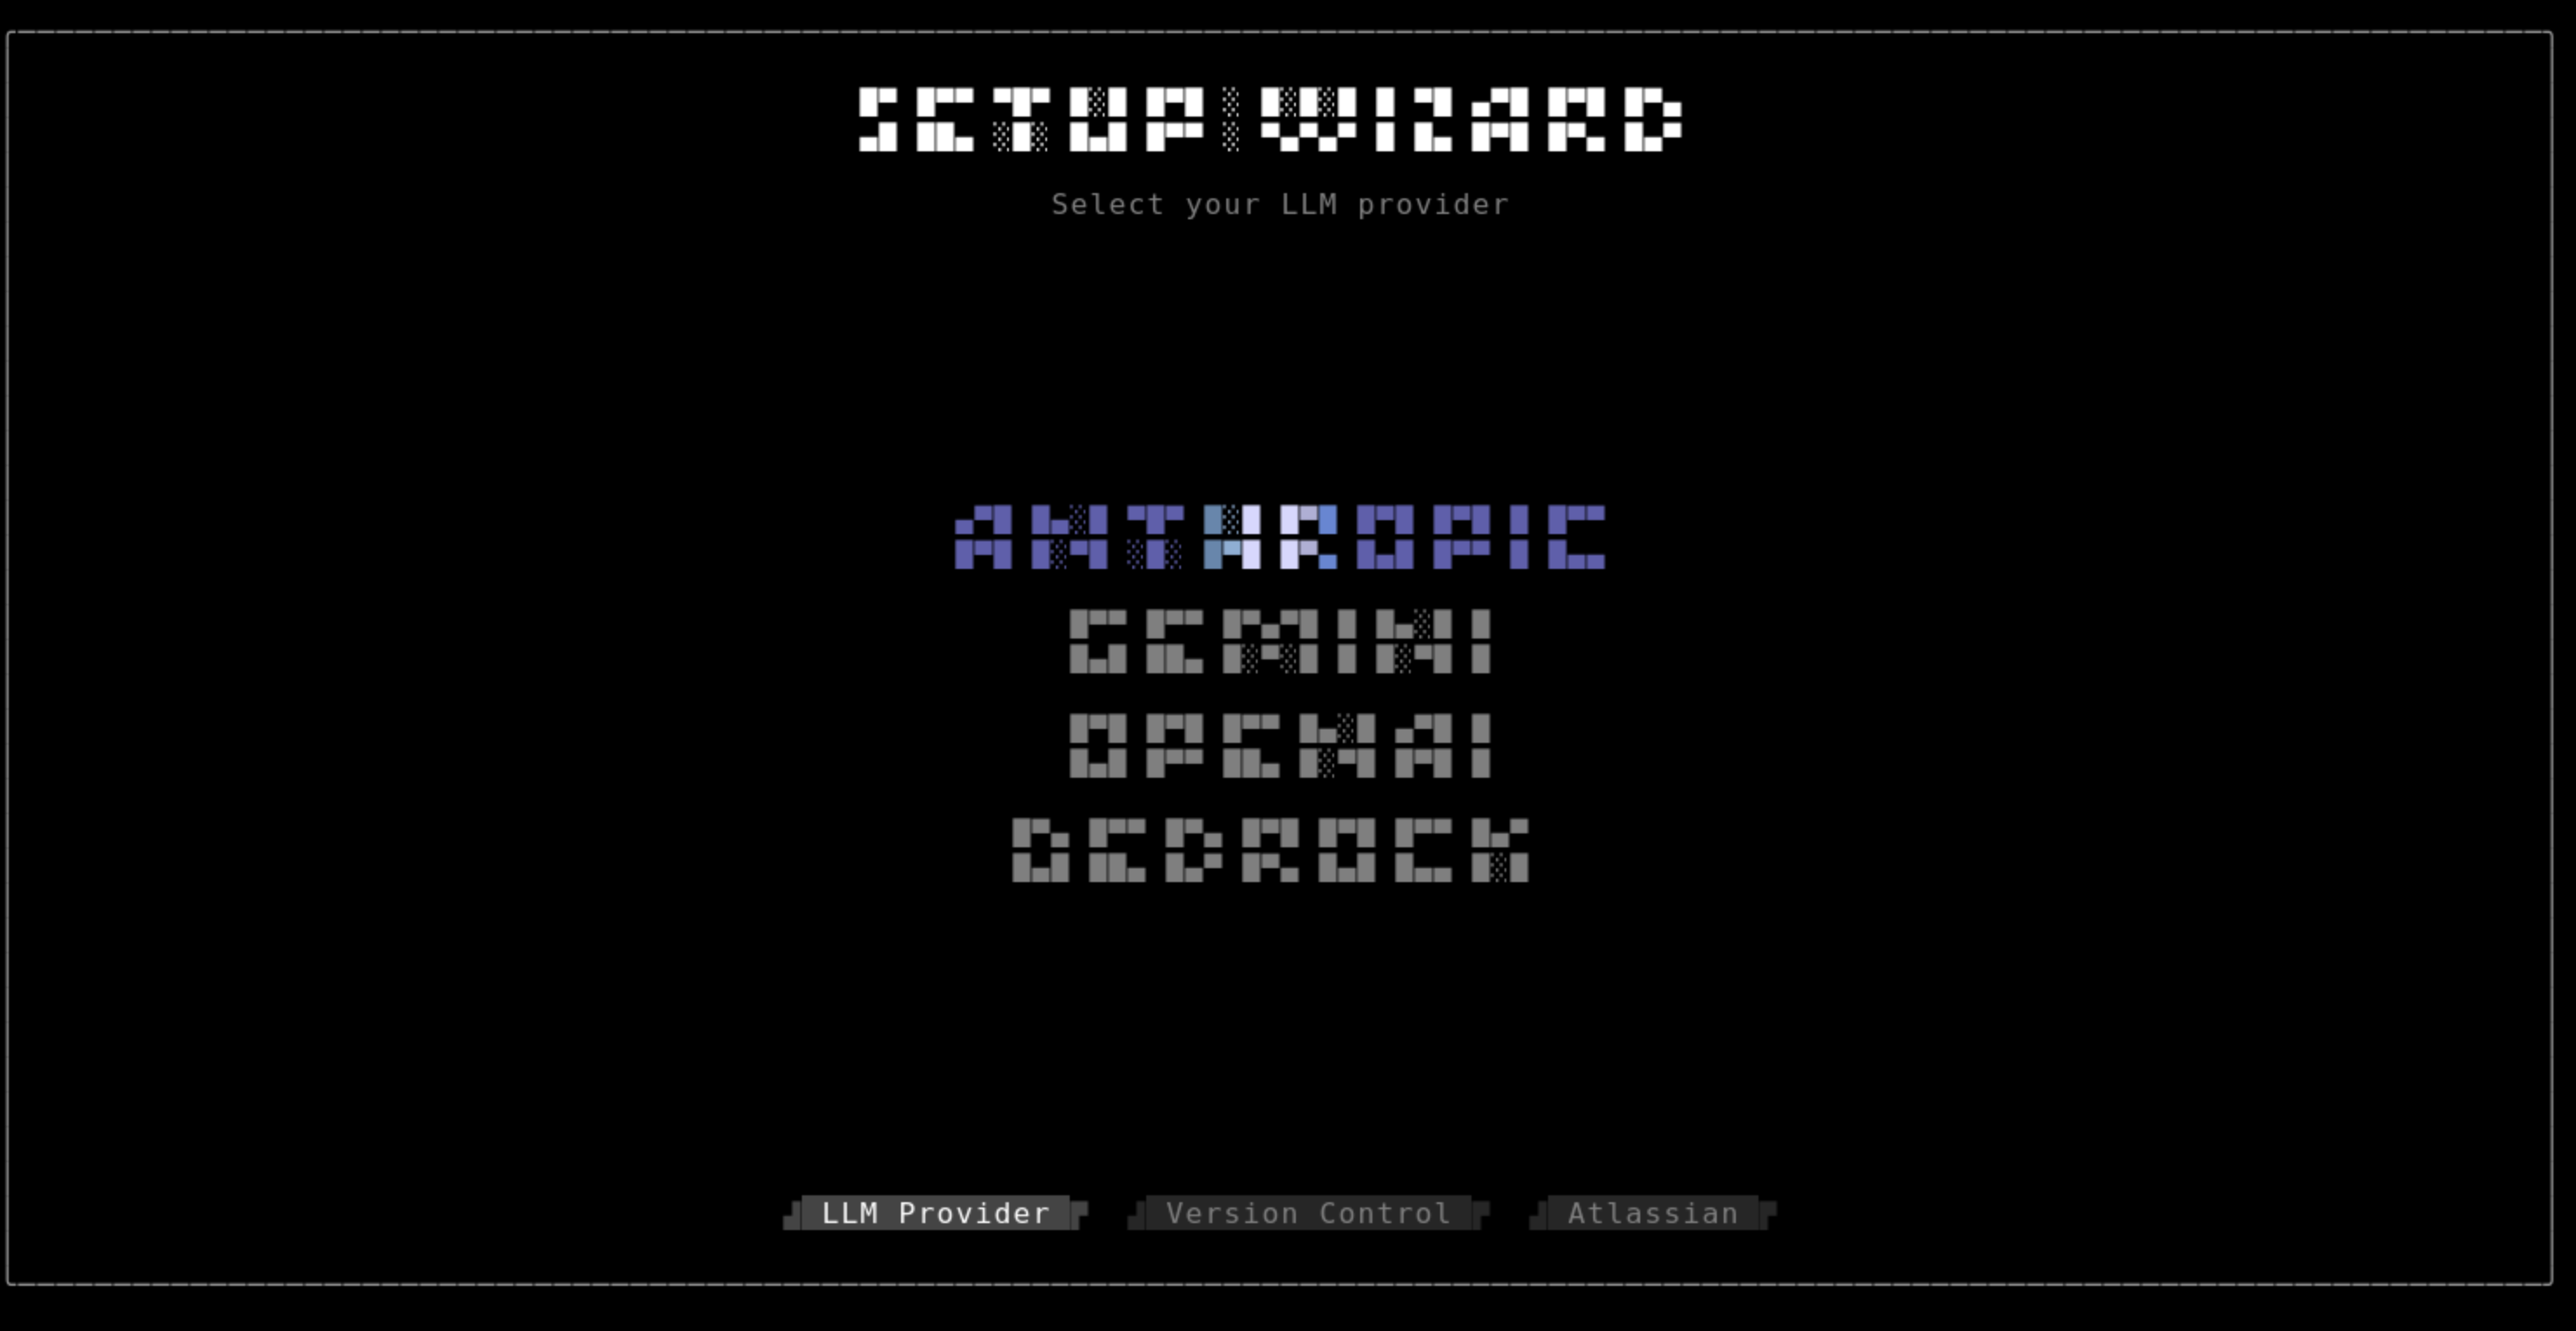
yeaboi --setup- Select Bedrock as your LLM provider
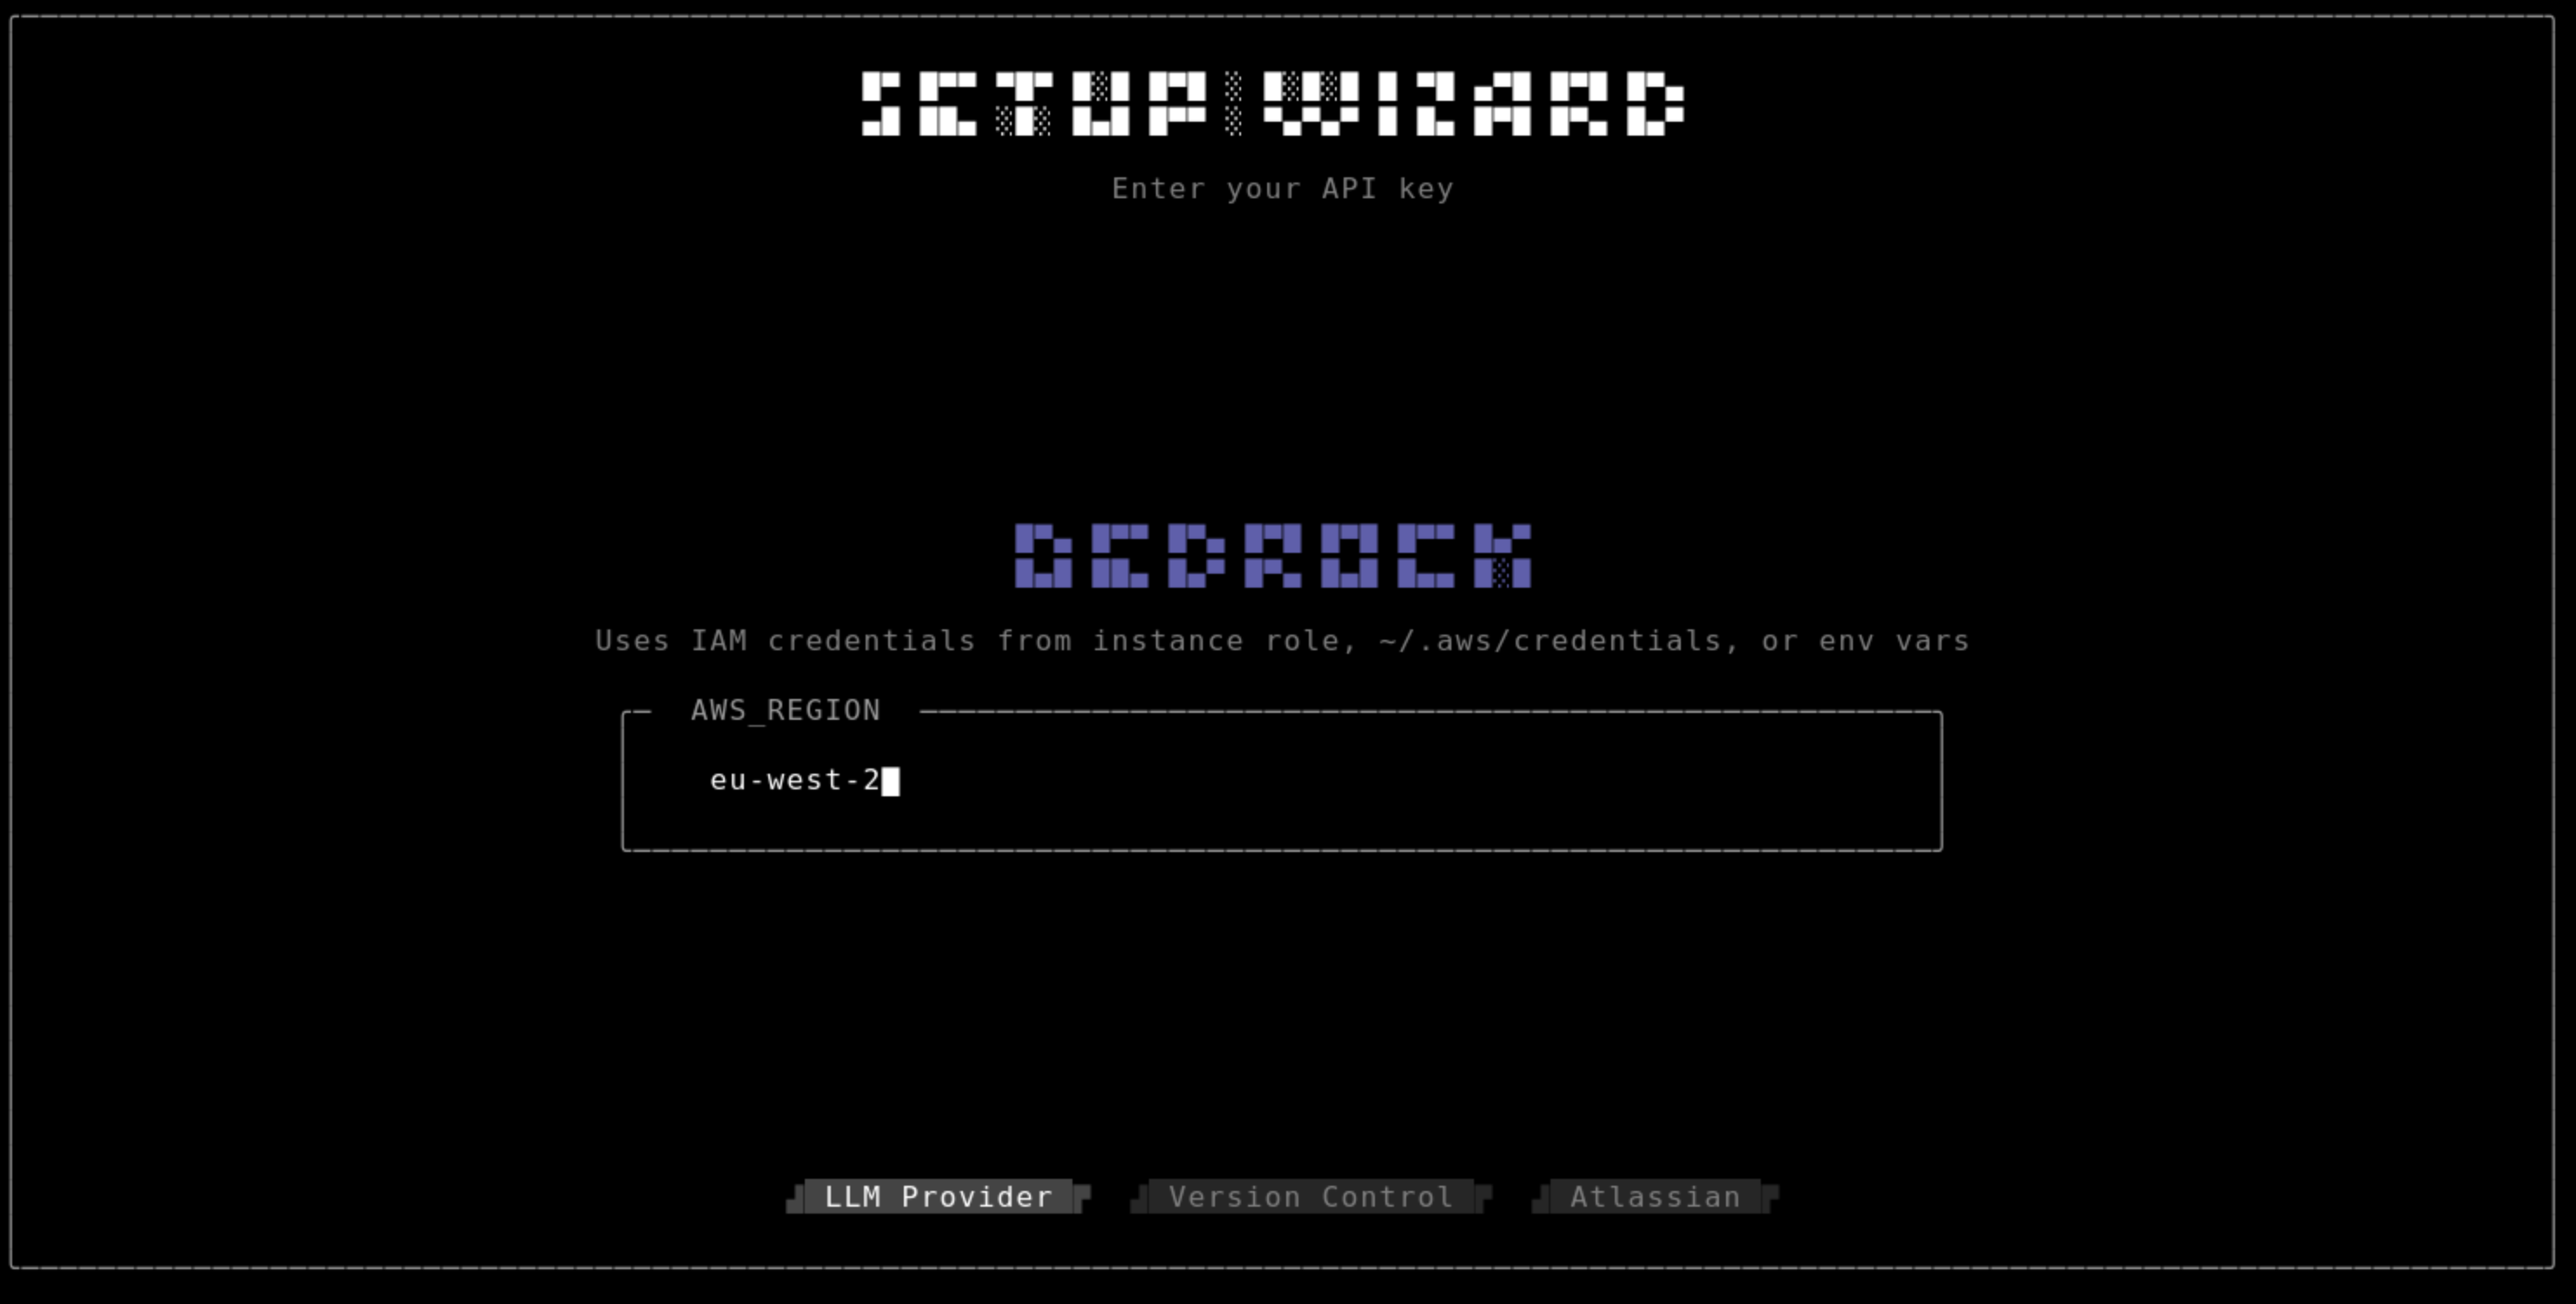
- The AWS region is auto-detected from
~/.aws/config(e.g.,eu-west-2) — press Enter to confirm - The wizard verifies Bedrock access using the IAM role attached by the Bedrock setup script — no API key needed
- If OpenClaw is installed, the Bedrock model ID (e.g.,
global.anthropic.claude-sonnet-4-6) is auto-detected and saved to~/.yeaboi/.env
7. Test headless mode
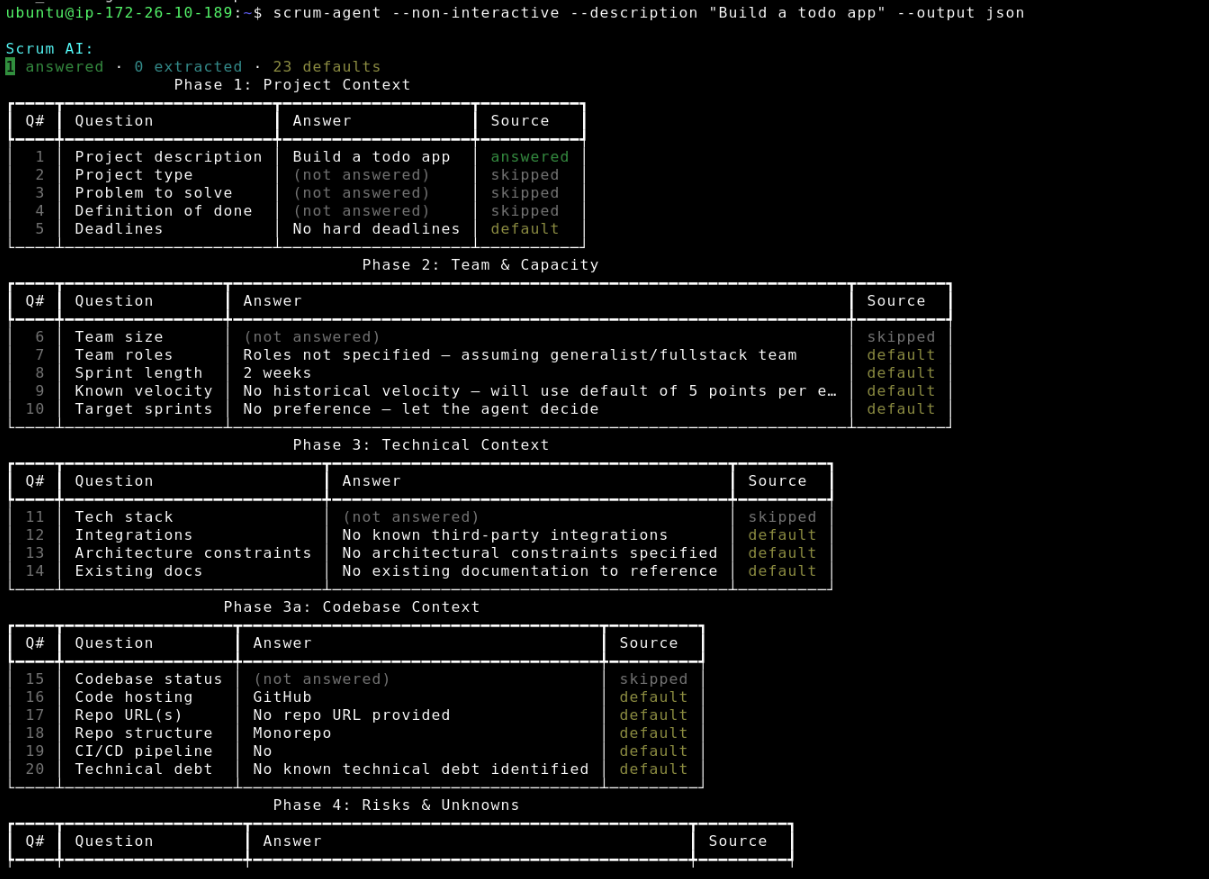
Verify yeaboi works end-to-end before installing the skill:
yeaboi --non-interactive --description "Build a todo app" --output jsonYou should see JSON output with features, stories, tasks, and sprints.
8. Install the OpenClaw skill
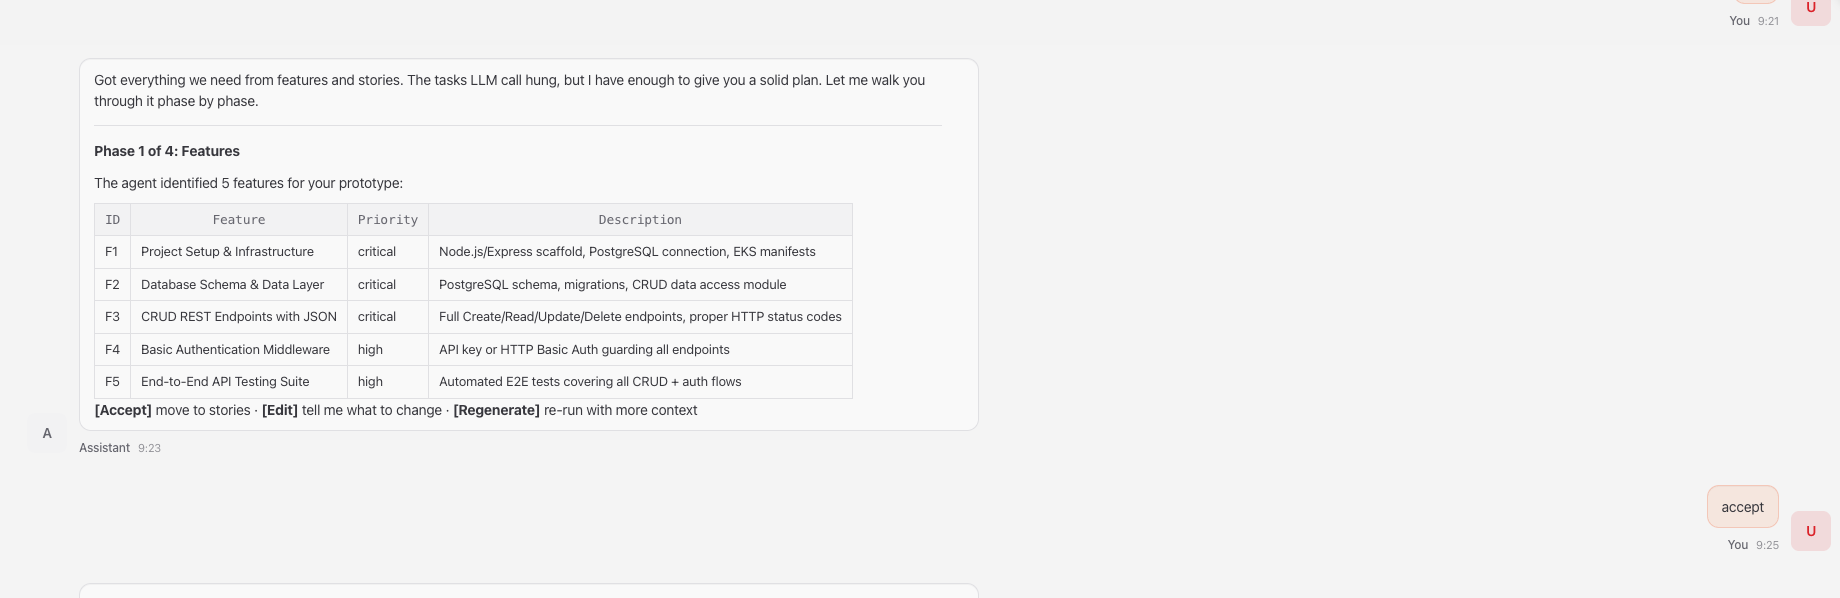
The scrum-planner skill lets OpenClaw conduct conversational scrum planning — it asks intake questions (or skips them in quick mode), generates a temp SCRUM.md, invokes yeaboi --non-interactive --output json, and presents results phase-by-phase with accept/edit/regenerate options.
Tip: After every
pipx install --force(e.g., updating to a new version), re-runyeaboi --install-skillto update the skill files and refresh the configuration.
A single command handles the full setup:
yeaboi --install-skillThis will:
- Copy the skill files to the skills registry at
/usr/lib/node_modules/openclaw/skills/scrum-planner/(may prompt for sudo) - Copy the skill files into the sandbox workspace at
~/.openclaw/workspace/skills/scrum-planner/ - Sync the Bedrock model ID and region from OpenClaw's config into
~/.yeaboi/.env - Disable the Docker sandbox so
yeaboiruns directly on the host - Restart the OpenClaw gateway to load the new skill
[1/5] Skill registry: /usr/lib/node_modules/openclaw/skills/scrum-planner
[2/5] Sandbox workspace: /home/ubuntu/.openclaw/workspace/skills/scrum-planner
[3/5] Bedrock config synced: model=global.anthropic.claude-sonnet-4-6, region=eu-west-2
[4/5] Sandbox disabled — yeaboi will run on host
[5/5] Restart OpenClaw gateway to load the skill? [Y/n]
Security note: This disables OpenClaw's Docker sandbox isolation, meaning tools execute directly on the host. This is safe for dedicated Lightsail instances running only the scrum-planner skill. For shared or multi-tenant setups, consider building a custom sandbox image with Python pre-installed instead.
To install to a custom skills directory:
yeaboi --install-skill /path/to/openclaw/skills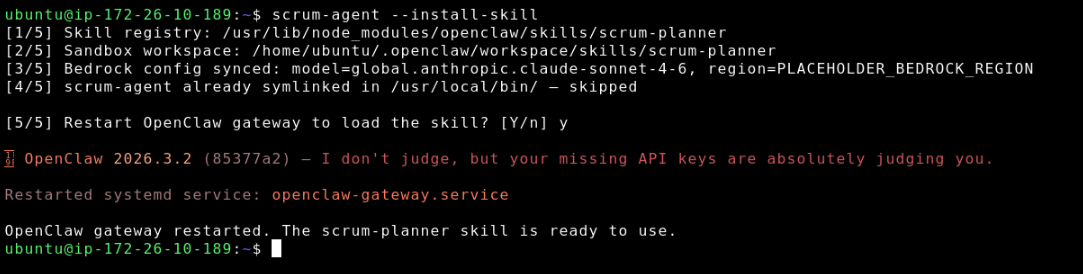
9. Verify the skill is loaded
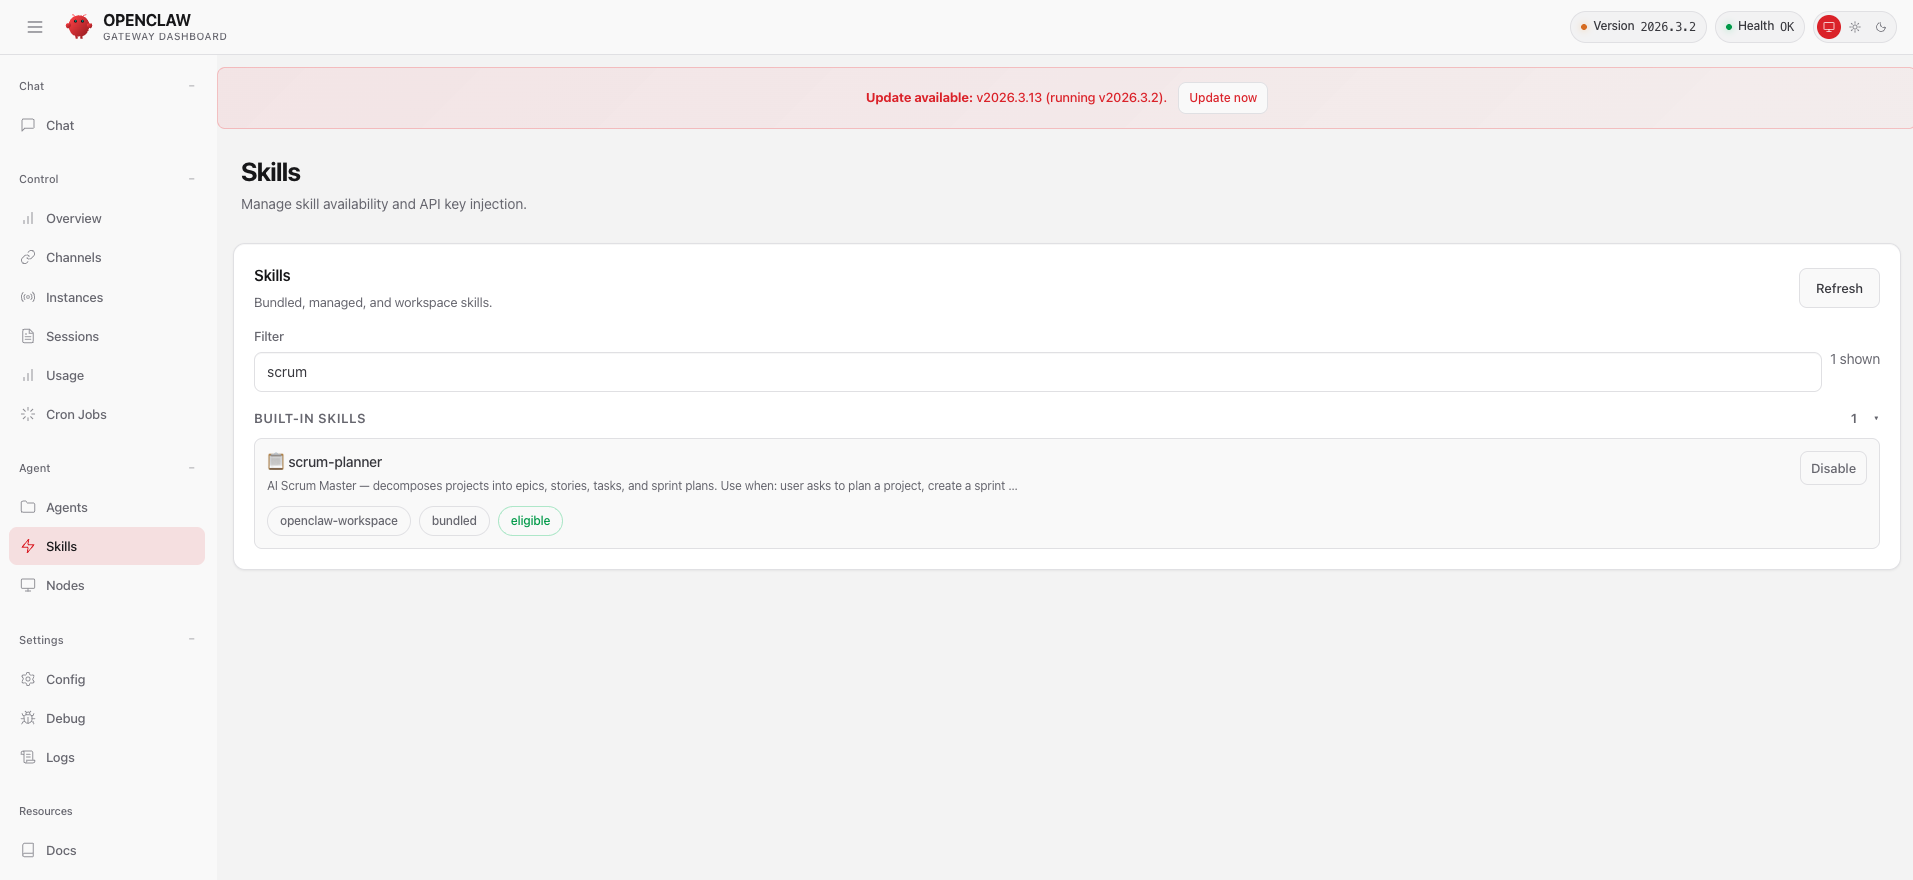
Open the OpenClaw dashboard and check the Skills page. You should see scrum-planner listed under Installed Skills with an "eligible" badge.
10. Test the skill
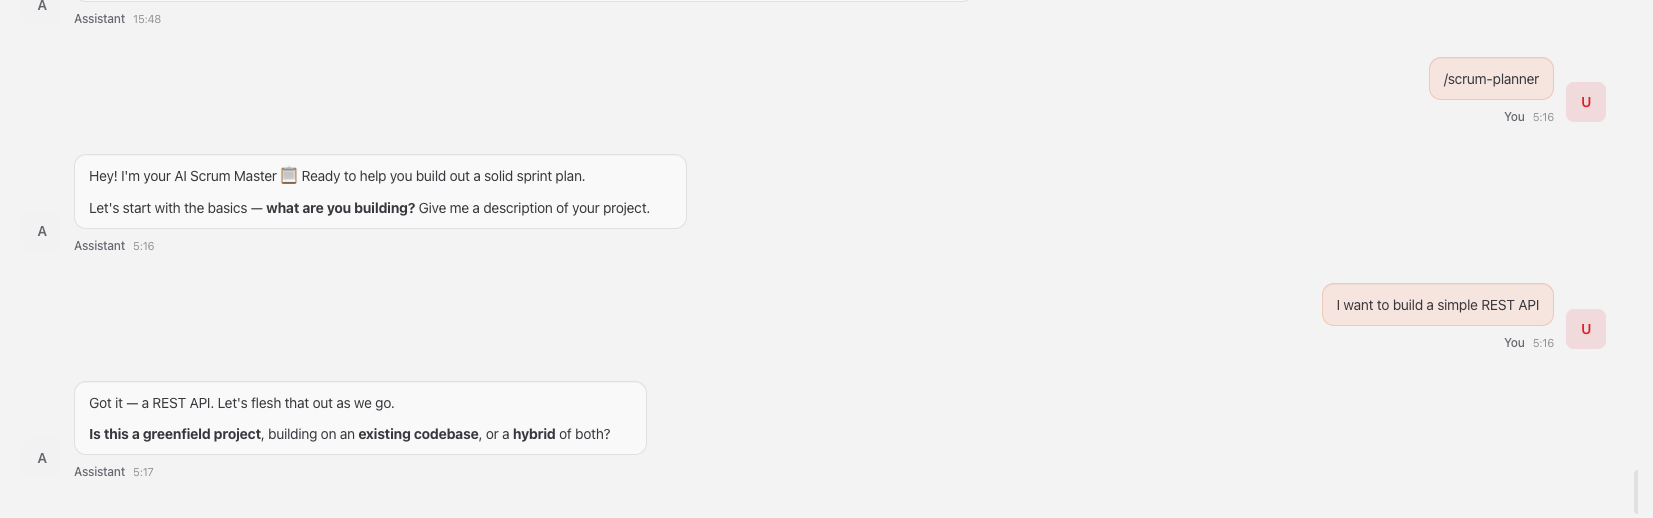
Start a new conversation in the OpenClaw dashboard or Slack. Try a detailed project:
"Plan an e-commerce marketplace — React + Next.js frontend, Python FastAPI backend, PostgreSQL, Redis, Stripe for payments, Auth0 for auth. 4 engineers, 2-week sprints. Deployed on AWS ECS."
You should see:
- Smart extraction — the skill detects project, tech stack, team size, integrations from your message
- Follow-up questions — only asks what's missing (project type, definition of done, target sprints)
- Confirmation summary — your answers + defaults, with option to override
- TUI recommendation — for complex projects (3+ features, 5+ engineers), the skill suggests installing the full TUI via
uv tool install yeaboiorpipx install yeaboifor interactive editing, sprint visualisation, and capacity planning. This is informational only — generation always proceeds. - Background generation — progress updates as each phase completes (~3-5 minutes)
- Phase-by-phase review — features, stories, tasks, sprint plan — each with accept/edit/regenerate
For a faster test, try quick mode:
"just plan it — todo app, FastAPI + PostgreSQL, 1 engineer"
11. Troubleshooting
If the skill doesn't appear in the dashboard:
# Re-install and restart
yeaboi --install-skill
If yeaboi fails inside the skill:
# Test headless mode directly
yeaboi --non-interactive --description "Build a todo app" --team-size 3 --sprint-length 2 --output json

# Check logs
ls -lt ~/.yeaboi/logs/ | head -5
tail -50 ~/.yeaboi/logs/*.log

# Check credentials
grep LLM_PROVIDER ~/.yeaboi/.env
12. Connect Slack (optional)
Connect OpenClaw to your Slack workspace so users can trigger the scrum-planner skill via @mention.
Quick setup (interactive)
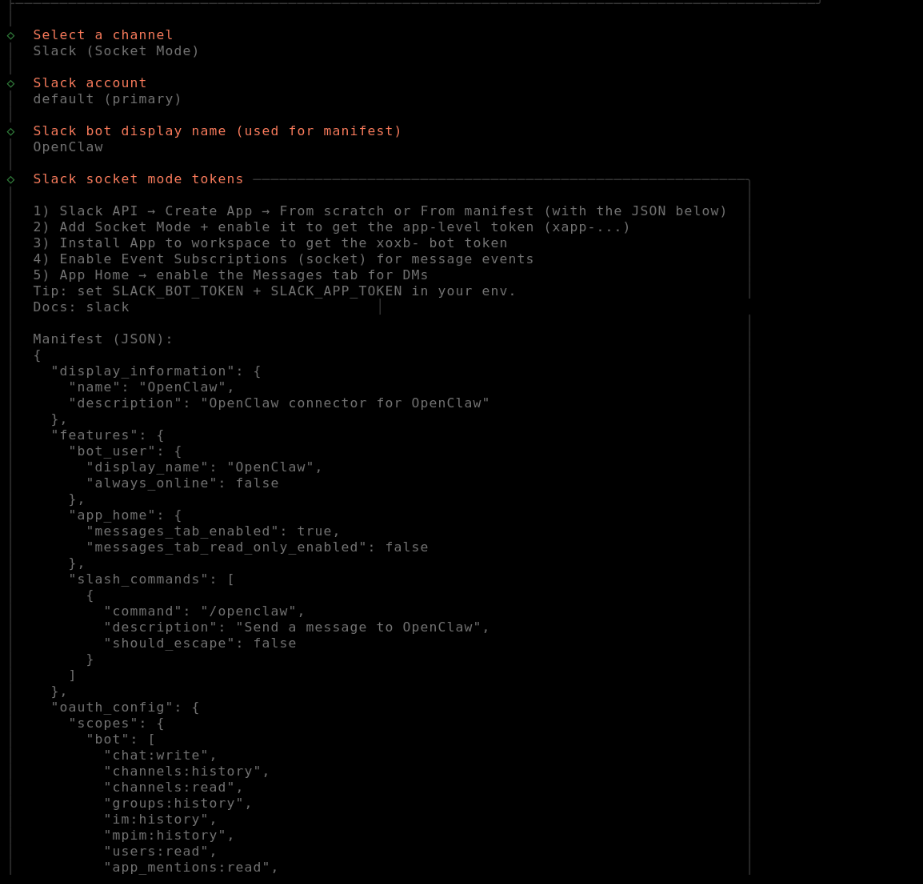
openclaw channels addFollow the interactive prompts — OpenClaw walks you through each step.
Manual setup
If you prefer to set up the Slack App manually:
- Go to Slack API → Create App → From manifest and paste the JSON below
- Socket Mode → Enable it → copy the App-Level Token (
xapp-...) - Install App to your workspace → copy the Bot Token (
xoxb-...) - Event Subscriptions → already configured via the manifest (socket mode)
- App Home → Messages tab is enabled for DMs
Slack App manifest:
{
  "display_information": {
    "name": "OpenClaw",
    "description": "OpenClaw connector"
  },
  "features": {
    "bot_user": {
      "display_name": "OpenClaw",
      "always_online": false
    },
    "app_home": {
      "messages_tab_enabled": true,
      "messages_tab_read_only_enabled": false
    },
    "slash_commands": [
      {
        "command": "/openclaw",
        "description": "Send a message to OpenClaw",
        "should_escape": false
      }
    ]
  },
  "oauth_config": {
    "scopes": {
      "bot": [
        "chat:write",
        "channels:history",
        "channels:read",
        "groups:history",
        "im:history",
        "mpim:history",
        "users:read",
        "app_mentions:read",
        "reactions:read",
        "reactions:write",
        "pins:read",
        "pins:write",
        "emoji:read",
        "commands",
        "files:read",
        "files:write",
        "canvases:read",
        "canvases:write"
      ]
    }
  },
  "settings": {
    "socket_mode_enabled": true,
    "event_subscriptions": {
      "bot_events": [
        "app_mention",
        "message.channels",
        "message.groups",
        "message.im",
        "message.mpim",
        "reaction_added",
        "reaction_removed",
        "member_joined_channel",
        "member_left_channel",
        "channel_rename",
        "pin_added",
        "pin_removed"
      ]
    }
  }
}
Important: The manifest includes
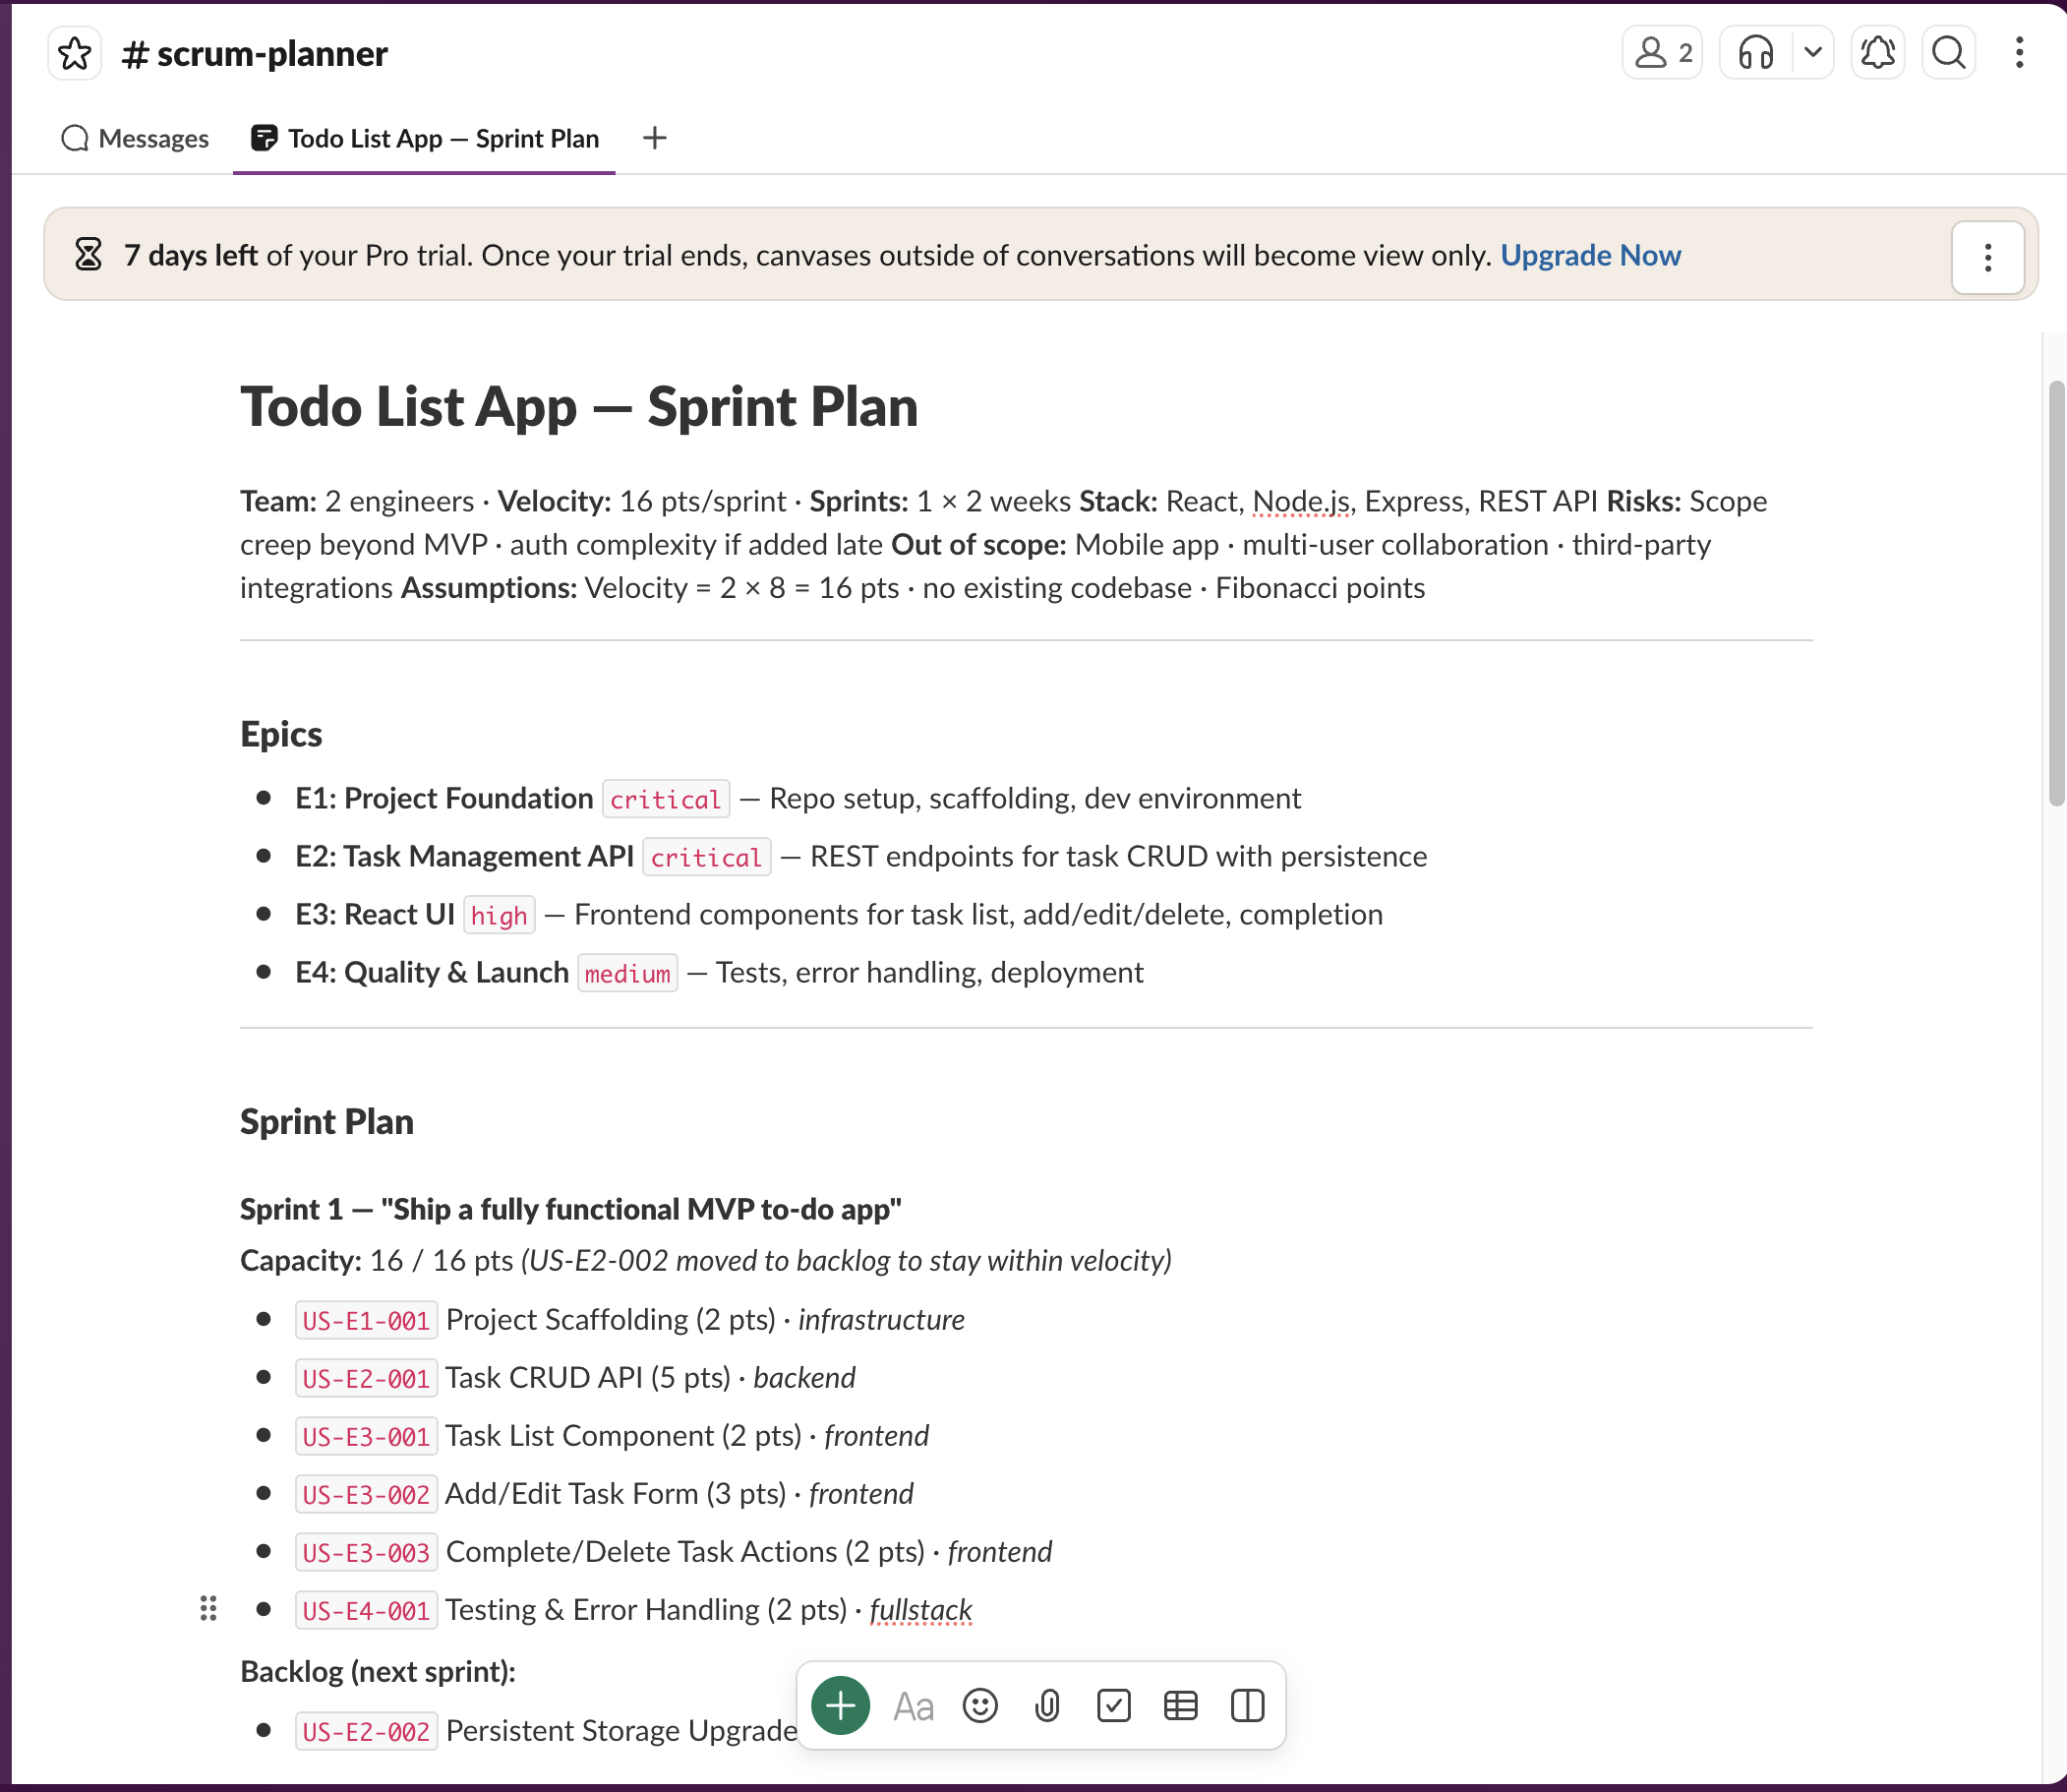
canvases:readandcanvases:writescopes. These are required for OpenClaw to post the finalized sprint plan as a Slack Canvas. Without them, the plan will be posted as threaded messages instead (which also works, but Canvas gives a better reading experience for large plans).
Set the tokens on the Lightsail instance:
openclaw channels add
# When prompted, enter:
#   App-Level Token: xapp-...
#   Bot Token: xoxb-...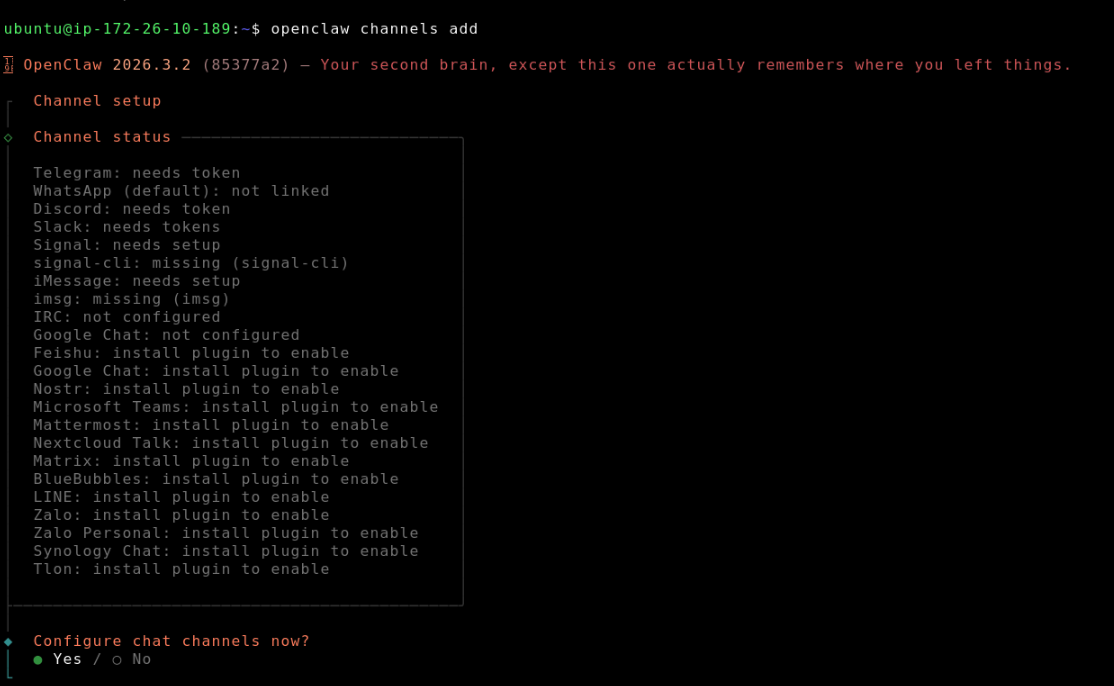
13. Use the skill in Slack
Once Slack is connected, @mention the bot in a channel to invite it. Send a casual first message to establish the thread — the bot's first reply won't appear in a thread, so keep it simple:
You: @OpenClaw hey, how's it going?
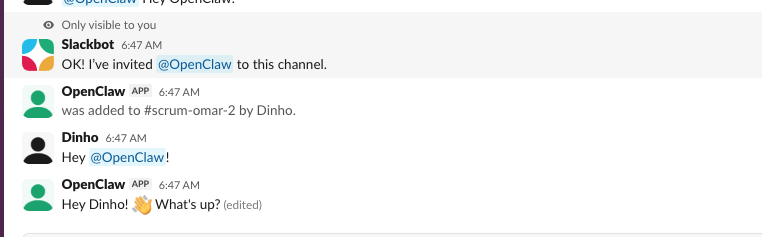
Then start your planning session in a new message (this one will create a proper thread):
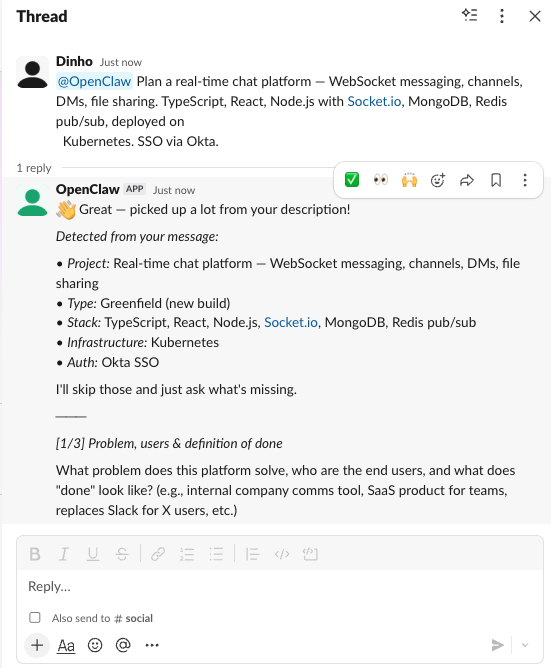
You: @OpenClaw Plan a mobile banking app — React Native, Node.js, PostgreSQL, 6 engineers
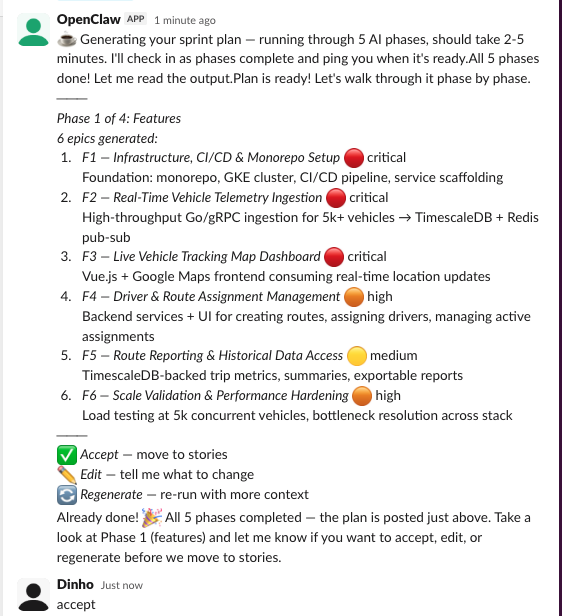
The skill runs the same conversational intake as the dashboard, directly in a Slack thread:
- Smart extraction — the bot detects answers from your initial message and shows what it found
- Follow-up questions — numbered choices for project type, sprint length, and target sprints
- Adaptive probes — "You said 6 engineers — what are their roles?"
- Confirmation — summary list with answer sources and defaults before generating
After confirmation, the bot runs yeaboi in the background (~3-5 minutes), then presents results phase-by-phase with accept/edit/regenerate options.
14. Next steps
- Push to Jira — Configure Jira credentials in
yeaboi --setup, then the skill offers "Push to Jira" after plan finalization. - Customize the skill — Edit
~/.openclaw/workspace/skills/scrum-planner/SKILL.mdto adjust question flow, add domain-specific defaults, or change the output format. - Review diagnostics — Check
~/.yeaboi/logs/for detailed run logs if anything looks off. - Secure with Teleport — For production use, add Teleport for identity-aware access to the Lightsail instance and OpenClaw dashboard.
See skills/scrum-planner/README.md in the repo for full skill documentation, question-to-CLI mapping, and troubleshooting.